| Application Examples of Other Event Handlers |
Learn how to use the handling, written in JavaScript, in the HTML file.
Examples of onMouse and onMouseOut
Let’s go look at the picture of a fish turning to bone, shown earlier in the previous chapter. In this example, two event handlers, onMouse and onMouseOut , will be used, and how to use them are shown here.
- Describes A element before event handling
- Designates event handler (onMouseOver)
- Designates event handler-2 (onMouseOut)
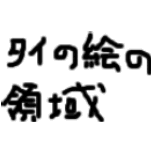
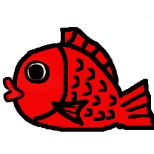
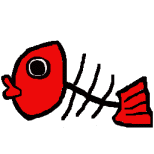
Although in the previous example we used only two images, here we will use the following three images to show you the motion more clearly.
When you actually try, save the following three by right clicking.
 |
 |
 |
| tainomoji.gif | tai.gif | hone.gif |
1. Describing A element before event handling
The initial A element before event handling is as shown below.
<!DOCTYPE HTML PUBLIC "-//W3C//DTD HTML 4.01 Transitional//EN">
<html lang="ja">
  <head>
    <meta http-equiv="Content-Type" content="text/html; charset=utf-8">
    <meta http-equiv="Content-Script-Type" content="text/javascript">
    <script type="text/javascript" src="./myscript.js"></script>
    <title>
      Session 11 sample HTML
    </title>
  </head>

  <body>
    <a href="http://www.google.co.jp/">
      <img src="./tainomoji.gif" alt="characters of fish">
    </a>
  </body>

</html>
Note here that the content of A element is img element. This means that the link normally denoted by characters is the image denoted by img element. In this example, an image named “./tainomoji.gif” is displayed and this becomes the link, which causes a jump to another page when clicked. The figure below shows the actual display of the above HTML by a browser.
When the image of “fish picture area” is clicked, the linked page http://www.google.co.jp/ will be displayed. Confirm this yourself by clicking.
2. Designating event handler (onMouseOver)
Next, let’s designate the event handler so that the bone picture will be displayed when the mouse pointer enters the image area. The event handler to be used is onMouseOver.
The following gazou1(), which is defined by myscript.js, is used as the handling of JavaScript to be activated.
In gazou1(), the image file of bone (./hone.gif) is treated as the value of document.gazou.src. The “gazou” within document.gazou.src shows the name that identifies the current objective image (area). This name has nothing to do with the file name of the image, and only shows the object of the handling by gazou1(), allowing free naming. Moreover, by designating this name within the HTML file, you can now handle the image (area).
function gazou1 () {
  document.gazou.src="./hone.gif";
}
- document : name to show a Web browser
- src : name to designate the file name of an object image
To activate this handling gazou1() within onMouseOver, you need to describe as follows. How to describe the onMouseOver attribute is the same as the case for an input element. Additionally, in the img element, name=“gazou” has been added. This name designates the name of the item (area) that the onMouseOver event handler assumes as the object. Since the name “gazou” designated by this name is set to the same as the object of gazou1() handling which the event handler activates, the execution of gazou1() will cause the replacement of images.
<!DOCTYPE HTML PUBLIC "-//W3C//DTD HTML 4.01 Transitional//EN">
<html lang="ja">
  <head>
    <meta http-equiv="Content-Type" content="text/html; charset=utf-8">
    <meta http-equiv="Content-Script-Type" content="text/javascript">
    <script type="text/javascript" src="./myscript.js"></script>
    <title>
     Session 11 sample HTML
    </title>
  </head>

  <body>
    <a href="http://www.google.co.jp/" onMouseOver="gazou1()">
      <img src="./tainomoji.gif" alt="characters of fish" name="gazou">
    </a>
  </body>

</html>
The figure below shows the display result of the above HTML by a Web browser. If you move the mouse pointer to the fish characters, the image should change to a bone picture.
By the way, in the above figure, the image will not change once it turns to the bone picture, regardless of where you move the mouse pointer . This is because only onMouseOver event handler has been used.
3. Designating the event handler 2 (onMouseOut)
So, this time, we will add an onMouseOut event handler so that once the mouse pointer moves outside the image area, the image will change to another one (fish picture).
previous gazou1() is that the designated file name is “./tai.gif”. Note that the name of the handling object, document.gazou.sec, remains the same.
function gazou2() {
  document.gazou.src="./tai.gif";
}
When you add the above handling, gazou2(), as the handling object by the onMouseOut event handler, the description will be as in following HTML. Note that because the objective area of gazou1 and gazou2 are naturally the same, the value of name attribute within the img tag stays the same.
<!DOCTYPE HTML PUBLIC "-//W3C//DTD HTML 4.01 Transitional//EN">
<html lang="ja">
  <head>
    <meta http-equiv="Content-Type" content="text/html; charset=utf-8">
    <meta http-equiv="Content-Script-Type" content="text/javascript">
    <script type="text/javascript" src="./myscript.js"></script>
    <title>
      Session 11 sample HTML
    </title>
  </head>

  <body>
    <a href="http://www.google.co.jp/"
             onMouseOver="gazou1()" onMouseOut="gazou2()">
      <img src="./tainomoji.gif" alt="characters of fish" name="gazou">
    </a>
  </body>

</html>
If you display the above HTML using the Web browser, the result will be as follows. This looks like the achievement of our objective, doesn’t it?
For example, let’s consider the case where the mouse pointer enters the objective area and stays there. The moment it enters the area, the event of “entering the area” occurs. But so long as the mouse pointer stays in the area, there will be no more “entering the area” events.
To enhance quality, let’s define the CSS shown below, not to display the border of the image. (You can put some easy-to-understand name to use .noborder.)
.noborder {
  border: none;
}
In this example, we have defined the css named noborder above to mystyle.css so that the border will not be shown.
Furthermore, if you put a fish picture at the initial image, you can have the intrinsic arrangement. Applying all of these is the following HTML.
<!DOCTYPE HTML PUBLIC "-//W3C//DTD HTML 4.01 Transitional//EN">
<html lang="ja">
  <head>
    <meta http-equiv="Content-Type" content="text/html; charset=utf-8">
    <meta http-equiv="Content-Script-Type" content="text/javascript">
    <meta http-equiv="Content-Style-Type" content="text/css">
    <link rel="stylesheet" type="text/css" href="../css/mystyle.css">
    <script type="text/javascript" src="./myscript.js"></script>
    <title>
      Session 11 sample HTML
    </title>
  </head>

  <body>
    <a href="http://www.google.co.jp/"
	           onMouseOver="gazou1()" onMouseOut="gazou2()">
      <img src="./tai.gif" alt="picture of fish" name="gazou" class="noborder">
    </a>
  </body>

</html>
This shows the one shown at the top of the previous chapter.
