| Basic Structure of HTML and Creation of HTML Files |
Study the basic structure of HTML (HyperText Markup Language), the most important component of a Web page, as well as the basics of how to create an HTML file.
The Basics of "Tag" in HTML
HTML divides the text which you want to present (publish) into a series of meaningful blocks to specify the role and nature of each block. The identifier (symbol) used to indicate the span of the block is called a tag. A tag means angle brackets ("<" and ">") and the character strings enclosed by the angle brackets.
For example, have a look at the example of a tag below. The text "Kumamoto University" is enclosed by two tags, and .
<strong>Kumamoto University</strong>
Some common conventions and rules regarding the tag are listed below. Please make sure that you remember them well.
- Name of the tag is an element name
The name of the tag (identifier) is called "element name". In the sample tag shown above, "strong" is the element name. - Tags must be written in the following format: <element name> content you want to present </element name>
<element name> is called a "start tag", and </element name > is called an "end tag". You have to always make sure that you enclose the content you want to present with a start tag and an end tag. Please note that "/" is placed before the element name in the end tag. - You should use single-byte characters for all the basic characters which make up the tag
You have to use single-byte characters for everything which makes up the tag including "<", ">", element name, and "/" in the end tag. (The "attribute name" discussed later is also written in single-byte characters).
- It is allowed to add "attributes" to the element
You can add attributes to additionally provide specific functions to the tag. To add an attribute, write the start tag in the following manner: <element name attribute name="attribute value">.
Please have a look at the example below:<a href="http://www.el.kumamoto-u.ac.jp/">Kumamoto University information technology education page</a>
In the example above, the start tag consists of the following parts:- Element name: a
- Attribute name: href
- Attribute value: http://www.el.kumamoto-u.ac.jp/
When you add an attribute, please remember the following requirements:- The element name and the attribute name should be separated by a single-byte space.
- The attribute name and the attribute value should be connected by a single-byte equal symbol "=".
- The attribute value should be enclosed by a single-byte double quotation mark """.
- Whereas the attribute name should always be written using single-byte characters, for the attribute value, you can use either uppercase or lowercase characters or include Japanese characters, depending on the situation.
You can specify two or more attributes. For example:<a href="http://www.el.kumamoto-u.ac.jp/" target="_blank"> Kumamoto University information technology education page (displayed in a new window)</a>
As shown above, in addition to "href", you can add another attribute "target" (to specify the place of display).
Using the "target" attribute, you can display the page on a uniquely named frame or window or use the following names which have already been registered.- _top: Removes the frame display so that the page is displayed across the entire window
- _black: Opens up a new window to display the page
Names that have been already registered include _self and _parent. Please check to see how they operate.
The Basic Structure of the HTML File
The basic structure of the HTML file is as shown in the image below.
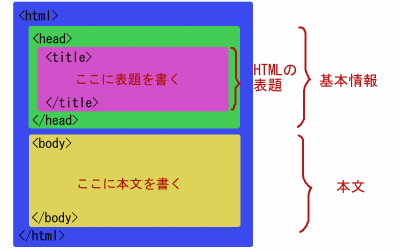
First of all, the whole document is enclosed by <html> - </html> to show that the whole document is an HTML document (block).
Secondly, you can see that the whole document is divided into two blocks, by the head element (<head> - </head>) and the body element (<body> - </body>).
The head element is an area where you give the basic information of the document. Basically, the content you write here will not be displayed on the Web Browser screen. However, the title element (<title> - </title>) inside the head element shown in the image above is an exception, as you put the name of the Web page here so that the name can be displayed at the very top of the Web Browser or on the tab.
The four tags shown here are the most basic tags of HTML, so please make sure that you write them all when you create an HTML file.
By the way, in the image above, these four tags are indented so that the nesting structure can be clearly seen. Whereas the html element is written from the beginning of the line without any indentation, as it is the largest element and encloses the whole document, the head element and the body element which are a part of it are indented slightly. Please note, however, that the level of indentation is the same for both the head element and the body element, because they are at the same level in terms of nesting structure.
Finally, the title element is indented further than the head element, because it is contained in the head element.
Please also note that corresponding start tag and end tag are placed with the same level of indentation so that it is easy to see where it starts and where it ends.
By using this kind of indentation, when you just look at the file you can understand the logical nesting (layer) structure visually, resulting in less mistakes when you write a tag.
In fact, in HTML, there is no distinction between "single-byte space" and "line break", as they are treated just the same as "white space"; in addition "multiple number of spaces" is treated as "one space". For example, although the two HTML files below look very different when you see them, they result in exactly the same display when they are actually loaded onto a Web Browser. In other words, in terms of HTML grammar, both of them are exactly the same.
It is strongly recommended that you write the HTML file based on the layout of the left-hand side image, because in that way it is much easier for you to understand the logical nesting structure, the correspondence between the start tag and the end tag, and so on.
Basic Method of Creating and Checking HTML Files
Please follow the instruction to actually perform every operation yourself.
You are to learn the following skills through this practice:
- How to create an HTML file using (Hidemaru) editor
- How to check the display of the HTML file (which you have created) on a Web Browser
- How to modify the HTML file (which you have created)
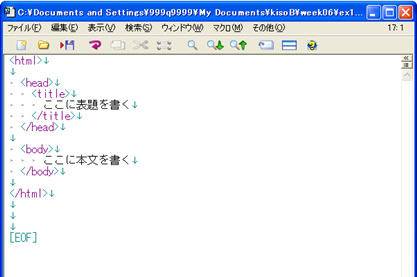
- Please follow the instruction below to input an HTML document to the empty file "week06\ex1.html" which is currently opened on the Hidemaru editor. (The final file should look like the following, but you do not have to pay too much attention to it at this stage).
- First of all, let us input the html element, which is the largest (outermost) block. When you do this, please use the copy & paste function, because apart from "/", the start tag and the end tag are the same. The level of indentation should be the same as well. (As this is the outermost block, there is no indentation; i.e., you start writing at the very top of the line.)
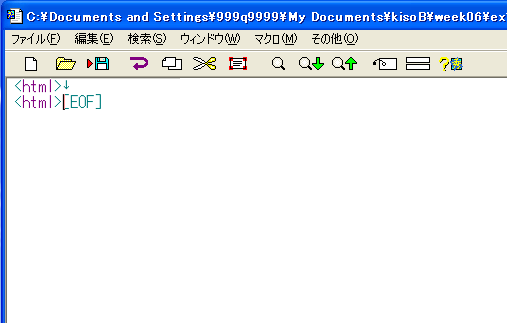
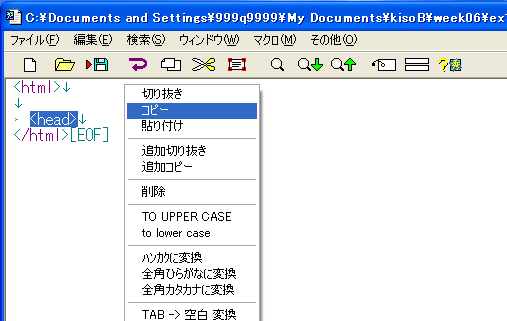
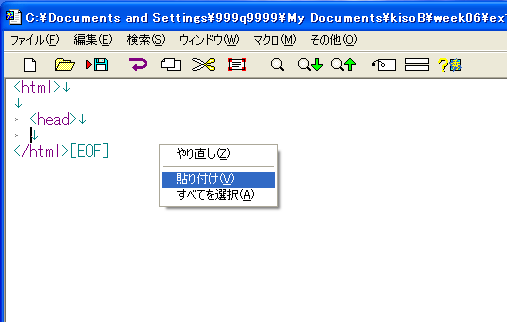
When you input the start tag for the html element using single-byte characters, select the whole tag by dragging the mouse, then right-click the mouse and select "Copy". After this, move the cursor to the top of the next line, then right-click the mouse and select "Paste" to paste the copied text.(Note) The green down arrow at the end of the line represents a line feed character.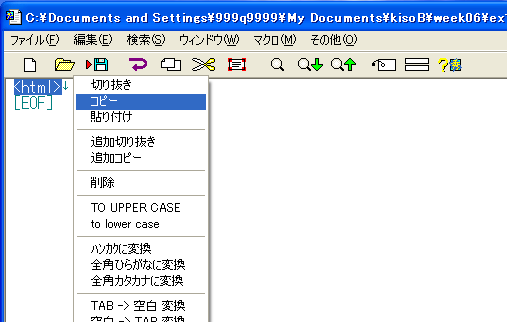


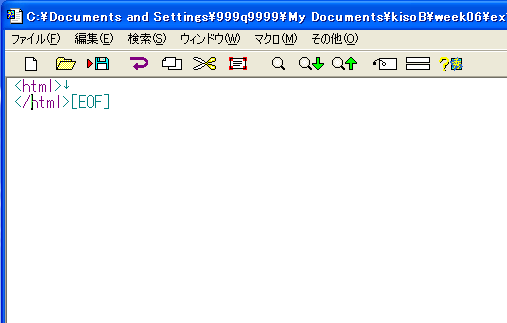
- Input "/" at the beginning of the tag pasted to make it the end tag. You have just completed the html element. If you input a tag in this manner, not only it is easier to input end tags, but also you are not likely to forget to input them. Please take full advantage of the copy & paste function of the editor.
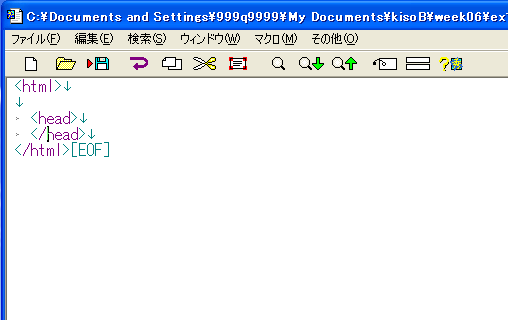
- Next, let us input the head element. As the head element is contained in the html element, the indentation level of the head element should be one level down from the html element.
Use the TAB key to indent the line, because it is much easier to do that. Since you configured the tab size to be "2" when you configured the Hidemaru editor, when you press the TAB key once, a "TAB character" is inserted and the cursor moves ahead leaving two spaces behind.(Note) The small ">" at the top of the head element represents a TAB character.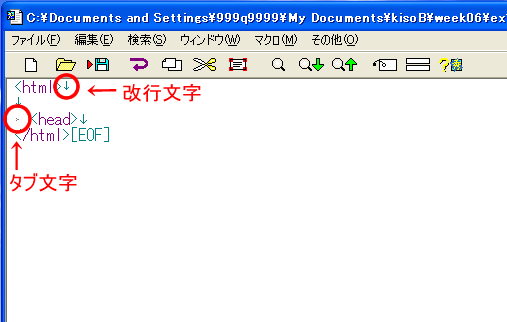
- Please input the end tag in the same manner as you have done for the html element using the copy & paste function.
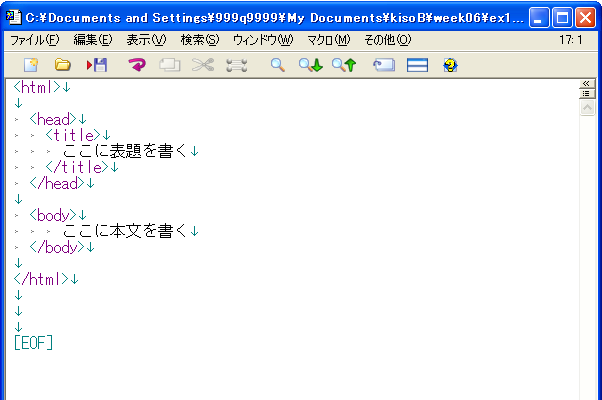
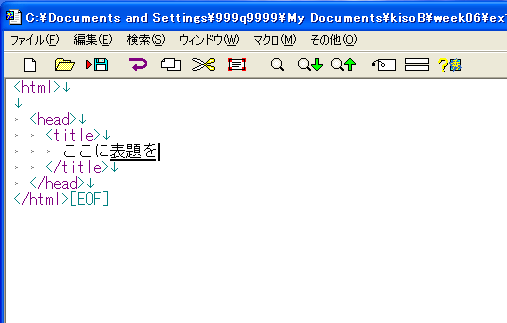
- Let us input the title element in the same manner. As the title element is contained in the head element, the indentation level must be one further down. Press the TAB key twice. After that, let us input the content of the title element. The text you input here will be displayed as the title of the page on the Web Browser. The Web Browser displays it at the top part of the window. Input the title as you like. When you input the title, make the indentation level one further down as shown in the image below, because it is easier to see the structural organization this way. (Press the TAB key three times.)
- Finally, input the body element and the main text of this HTML file. For the main text, please input anything you like.
Now you have just created a bare minimum HTML file. When you have completed the file, please do not forget to save the file. (Please leave the Hidemaru editor up and running, because you are going to modify the file later on.)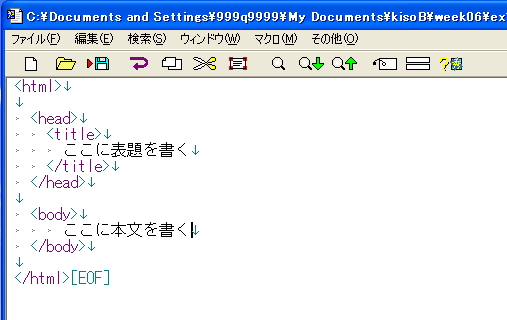
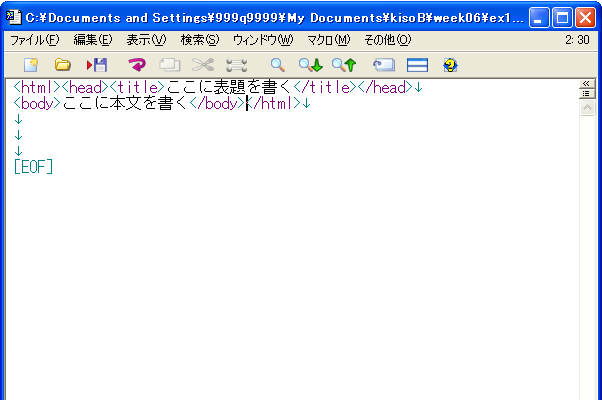
(Note) The function of the empty line is just to show that the block is separated there, so that it becomes easier to see the structural organization. The display on the Web Browser is the same, regardless of whether or not there is an empty line. The image below shows the same file as above, except that there are no empty lines. However, the display of this file on the Web Browser is the same. Please insert an empty line whenever the empty line makes the file more understandable.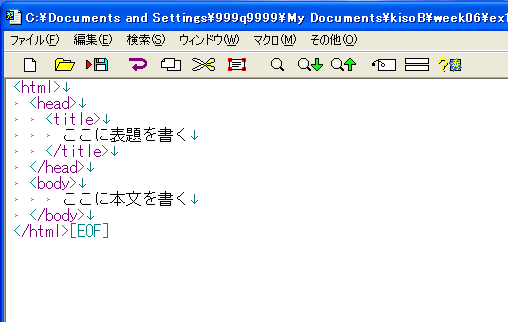
- When you have completed the HTML file (even if it is not completed yet, but you have done some of the input work), the first thing you are supposed to do is to check the file on the Web Browser to see if the structure you intended to create is there as you would like.
It is easy to check the file; all you have to do is to double click the icon of the HTML file you have created.
From "My Documents", move to "week06" then double click the icon of the "ex1.html" you have just created.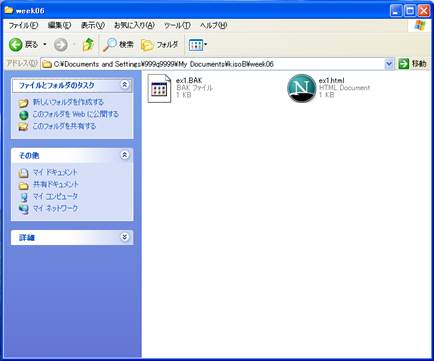
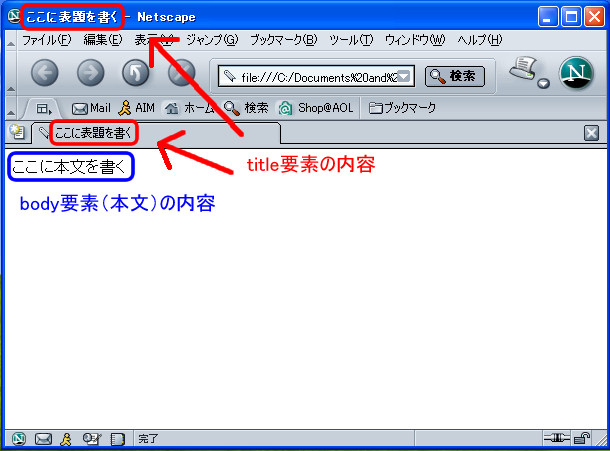
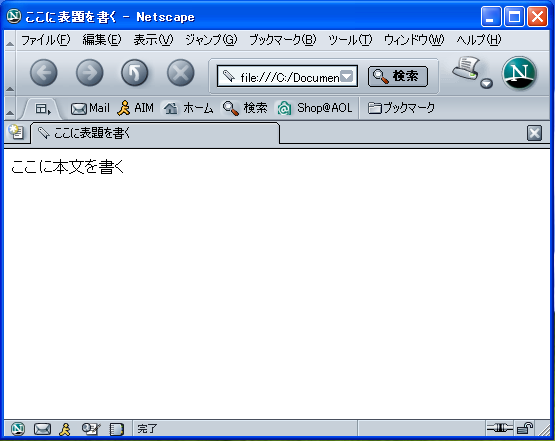
If you do this, the Web Browser will open up to display ex1.html in accordance with the language specification of the HTML.
The content of the title element you have just input should be displayed at two places in the upper part of the window, and the content of the body element should be displayed on the browser screen.
- Finally, let us practice how to modify the content of the HTML file you have created. If the file is open on the editor, all you have to do is to make any modification to the file and save it. However, if the file is not open or you have to start up the PC to modify it, make sure that you open the file on an HTML file editor such as Hidemaru.
Here, for the sake of practice, if the Hidemaru editor is up and running, please exit from the Hidemaru editor altogether.
Right-click the icon of the file "ex1.html" you have created and select Hidemaru (editor).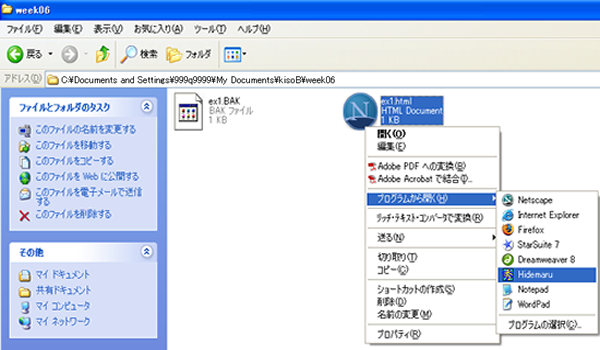
Once the HTML file is opened on the editor, please modify the file as required. The image below is only a sample; modify the content as you like. However, please note that here you change just the content of the title element and the content of the body element. You will practice other changes in the next practice and the practices after that.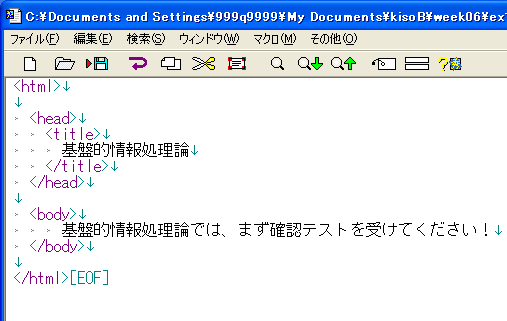
When you have completed the modification, before anything else make sure that you save the file.
After that, click the "Refresh" button on the Web Browser to let the browser reload the modified HTML file to update the display.
If you do this, the content of the modified HTML file (i.e., the title of the page and the main text) should be displayed on the Web Browser.
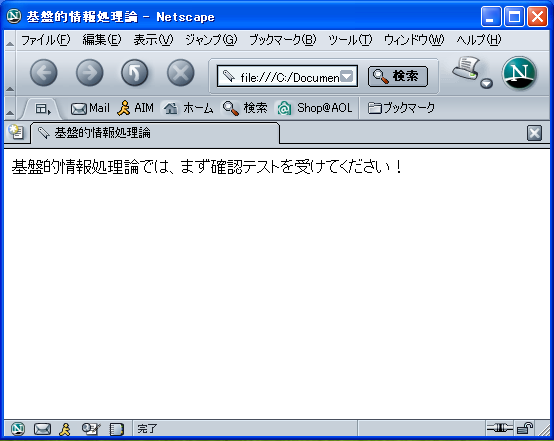
How did you go? Did you get what you wanted? If you didn't or you want further modification, modify and save the file on the Hidemaru editor again, then click the Refresh button on the Web Browser to check the result.