| Start-up of GIMP and File Operations |
[The purpose of this section]
Learn how to start up the Painting software "GIMP" and how to manipulate files.
Learn how to start up the Painting software "GIMP" and how to manipulate files.
The Painting software used at this time is "GIMP (GNU Image Manipulation Program)." The use of GIMP not only allows painting pictures, but also enables one to apply various processing to operations pictures and photos, hence it is sometimes called image-processing software. Since this software is a so-called freeware, you can download it for free installation on your PC. Although it is free, GIMP provides fairly high-level functions that compare favorably with those of commercial software products.
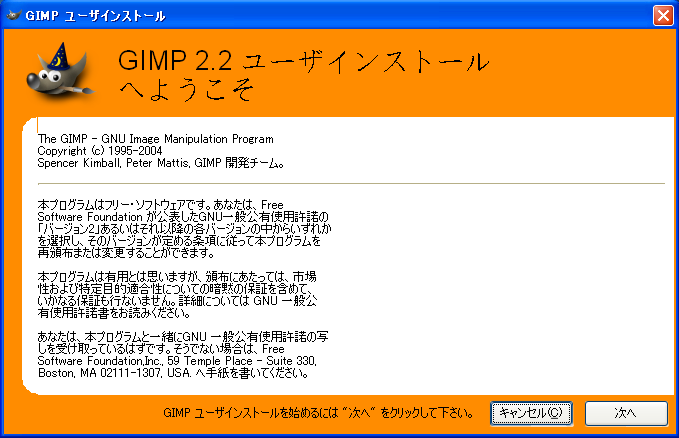
(Note) For those of you, who have not yet installed GIMP, prepare the environment by referring to this.
Start-up of GIMP and File Operations
[Practice 1]
After creating a folder named "week05," start up GIMP. Then name the empty image file "exl.xcf," and store it in the above folder.
Note that "exl.xcf" is a file name consisting of only single-byte characters.
After creating a folder named "week05," start up GIMP. Then name the empty image file "exl.xcf," and store it in the above folder.
Note that "exl.xcf" is a file name consisting of only single-byte characters.
- Start up GIMP.
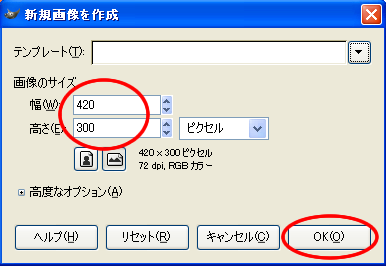
- Create a new image (window), by selecting "File" menu on Toolbox -> "New."
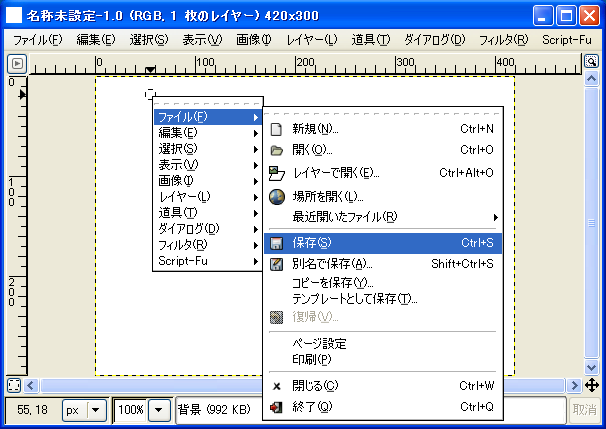
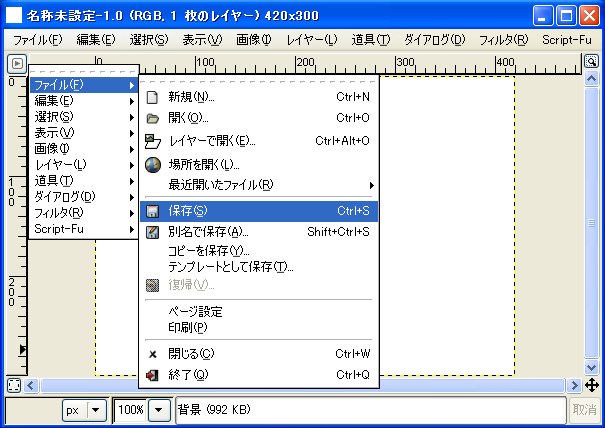
In this window, specify the image size (the number of vertical and horizontal pixels that make up the image) by entering the numbers in "Width" and "Height." Since we will use the default value (which means the initial setting without any operations) this time, click on the "OK" button. - Click on the "Upper left triangular icon" or "Right click inside the display area" to pull down the menu, and select "Save" from the "File" menu.
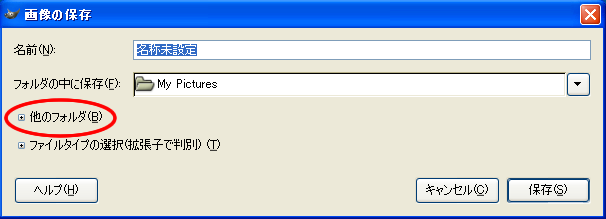
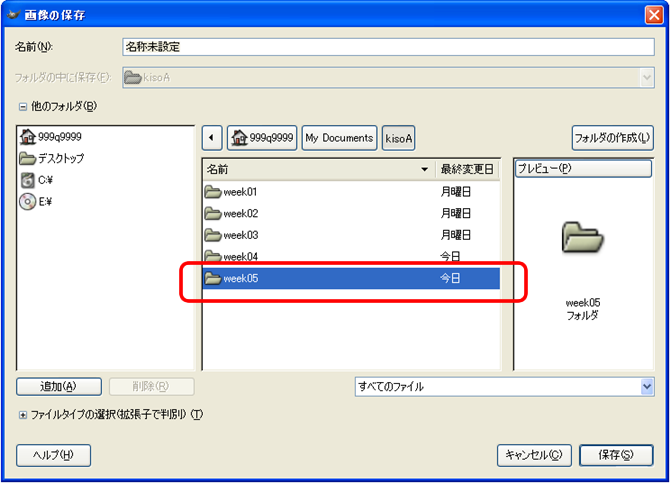
- Specify the folder (directory) to save the image. If you click on “Other folder,” you can refer to the save destination. Refer to the “week5” and double click on it.
- Then confirm that the "Save option" at the bottom left shows the selection of "Identify by extension."
Next, enter "exl.xcf" in single-byte characters as the file name to the "Name" box, and then click on the Save button to save.
Since "xcf" is the dedicated extension for GIMP only, make sure to write it correctly.
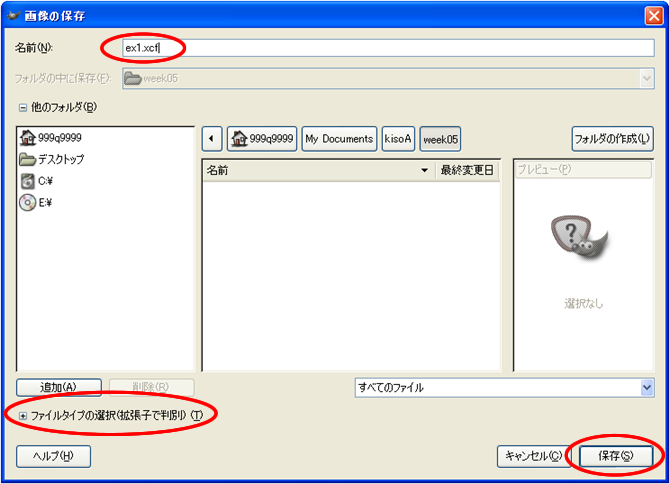
(*) When you omit the extension or enter it wrongly, the alarm will be initiated, at which point you specify "xcf" and then save.
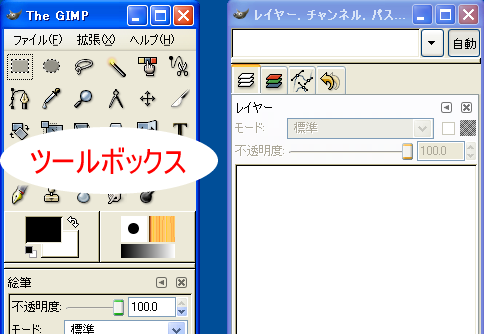
(Note 2) After start-up you will see several windows being opened. However, under GIMP, all basic processing is done through "Toolbox" with the title "The GIMP."
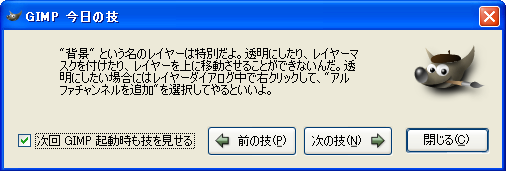
(Note 3) During start-up, the following window "Today's GIMP Technique" will be opened. This introduces various techniques of GIMP to users. Since it shows different contents every time, this should help you enhance your skills. You can close the window after you read it. If you find reading it unnecessary, you can enter a check to "off" (not selected) to the "Show technique at next GIMP start-up" checkbox and then click on the Close button.
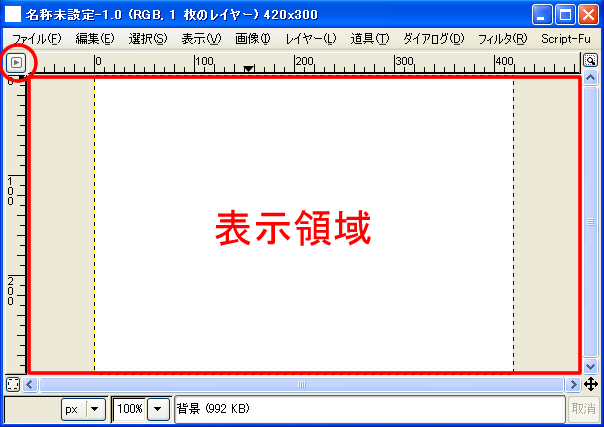
Then a new image as shown below will be displayed on the image window. Thereafter, this window becomes the object of editing.
To manipulate this image, you can either "click on the upper left triangular icon," or " Right click inside the display area" to display the menu for manipulation.
or