| Sample of Layer Operation |
[The purpose of this section]
Understand the layer operation and the concept of layer through samples.
Understand the layer operation and the concept of layer through samples.
Samples of How to Use Layer Functions
[Create a new layer]
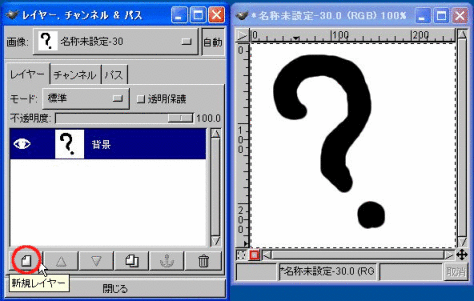
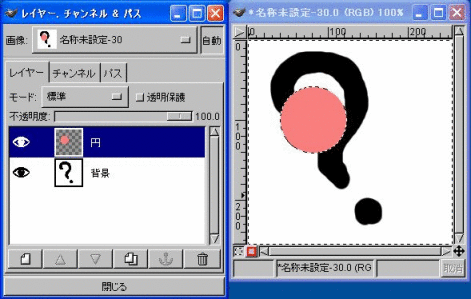
- Display the “ex2.xcf” that you created in Practice 3, click on “New layer” icon at bottom left of the “Layer, channel & path” dialogue, and create a new layer. 。
- On the New layer option, which comes up, put a name to the layer. (In the example below, a name “Circle” is attached.) Confirm that “Transparent” is selected, since the layer is basically transparent, and then click on “OK.”
Then you can see from the “Layer, channel & path” dialogue that a new layer has been added. Note, however, that the painting area shows no difference, because a transparent sheet has been overlaid.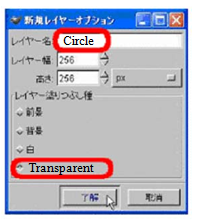

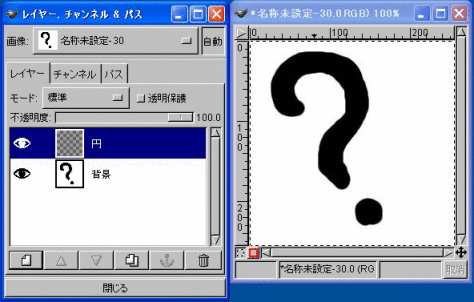
- When a new layer is created, the new layer is already selected, allowing any operation on this layer to start immediately.
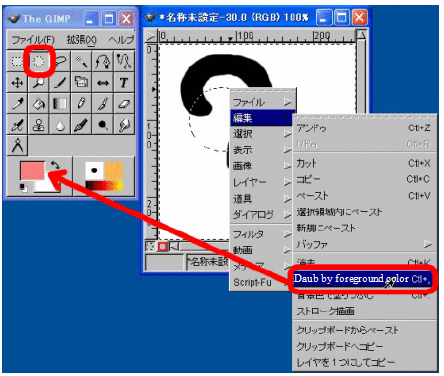
To draw a circle, for example, you need to select the painting color first, then select the circular area selection tool to select the circular area as shown in the figure below; if you do this while holding the shift key, you can draw a perfect circle. Thereafter, right click on the painting area, and from the “Edit” menu select “Daub by foreground color,” to paint a daubed circle. - When the area selection tool is selected, clicking on any area other than the area just painted will fix (determine) the image you just created.
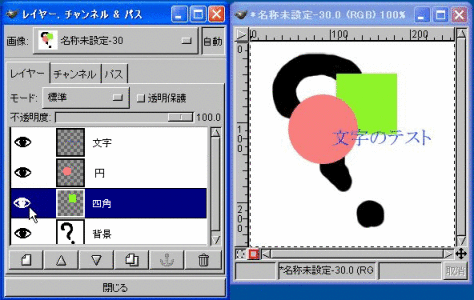
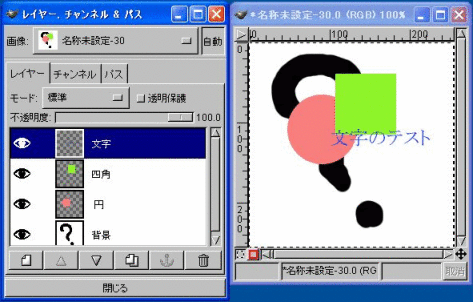
- Add another two or three layers in the same manner.
In the example shown below, a layer of a square and a layer of characters (“Test of characters”) are created, each carrying the respective image.
This concludes the painting operations. But only this will not mean much in terms of using the layer, will it? Once you create an image, you will sometimes encounter a situation where you wish to change the up and down relation, or move a portion of the image. Next, let's learn how to change the up and down positions and set the nondisplay (or display) mode for a certain layer.
[Change up and down relation (or foreground/background relation)]
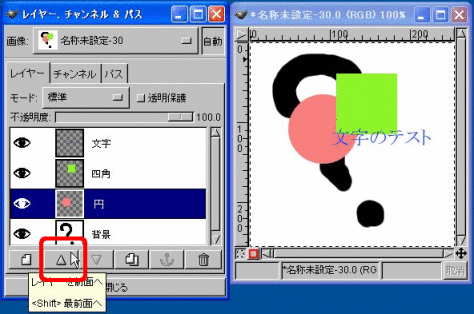
- Select the layers for which you wish to change the up and down relation, by the “Layer, channel & path” dialogue (click on the columns of the layer where the respective image is painted).
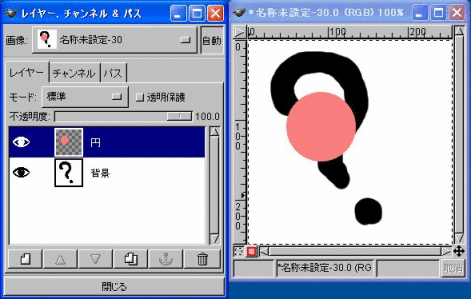
In the figure below, the layer of “Circle” is currently selected. By clicking on the “Forward” or “Backward” icon at the bottom of the dialogue, you can move the layer in the respective direction (up or down).
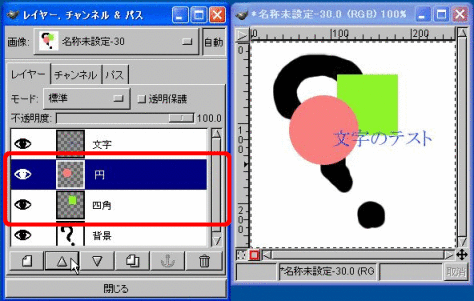
For example, if you move the “Circle” layer to the up direction (foreground direction) once, you can see on the “Layer, channel & path” dialogue shown below that the “Circle” layer goes up one step, and in the painting area you will see that the circle is over the square (but still under the characters).
- If you have an unnecessary layer, you can click on the “eye-shaped icon” in the leftmost column and erase the icon, to set nondisplay of the layer.。
In the example below, the “Square” layer is set to nondisplay.