| Creating GIF Animation |
Learn how to create GIF animation using StarSuite Impress (presentation) as well as how to insert the GIF animation file you created into the Web page.
Obtaining Template Files
From now on, we are going to do some practices on various elements of HTML and CSS. However, before we do that, let us download some template files for the practices.
Please follow the steps below to download the HTML template files.
- First of all, create a folder called “week09”.
- Click >here< and save the compressed templates file, naming it “template1.zip”.
- When you double click on the icon of “template1.zip”, you can see a “template1.html” icon. Right click on that icon and select “Cut” to paste it to the “week09” folder as “week09\ex1.html”.
Creating GIF Animation Using StarSuite
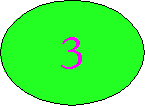
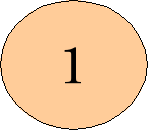
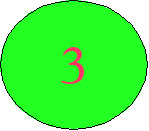
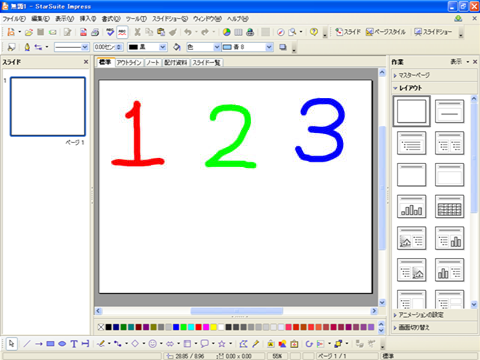
“GIF animation” is a file structured in such way that multiple sets of image material data are displayed one after another in the manner of a flip book. For example, the below image is an example of simple GIF animation.
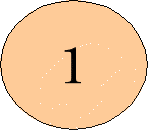
This animation file displays the following three images one after another.

Therefore you need to go through the following two steps to create a GIF animation.
- Create the required number of image material files you want to use for the animation.
- Use GIF animation software to put together these images you created to convert them into a GIF animation file.
Now, from now on I am going to explain how to make a GIF animation while using some concrete examples along the way. Please refer to the below explanation to create your own GIF animation file.

Copyright (C) Eri Hayashi 2005, All Rights Reserved
Please follow the steps below to create a GIF animation file.
As the image files shown in the procedure are sample images, please create three simple image materials for yourself 、 and create a GIF animation based on them.
Please save the GIF animation file you created, along with the StarSuite Impress (presentation) file, in “week09”.
As for the image materials, each of which shall be used as one of the frames, please make them simple without much hassle, because the purpose of this practice is “to learn how to create a GIF animation file”.
1. Creating image materials and reading them into StarSuite Impress (presentation)
■■ General method (out of the scope of this practice) ■■
Create all the image files required for the display of the frames one by one, using image creation application such as GIMP. Save the image as a general-purpose image file such as a “GIF”, “JPEG”, or “PNG” image rather than in a customized format for the application. At this stage, please make sure that all the images are of the same size, as this makes the resulting animation more presentable.
Read all the images you have created into StarSuite Impress (presentation). To read, start up StarSuite Impress (presentation) and select “Image” from the “Insert” menu to read the image files you created one by one.
For example, the below image shows the situation where you have just read three hand-written figures you created using GIMP into StarSuite Impress (presentation). If you come to this stage, the preparation for creating a GIF animation is complete.
■■ The method we use in this practice ■■
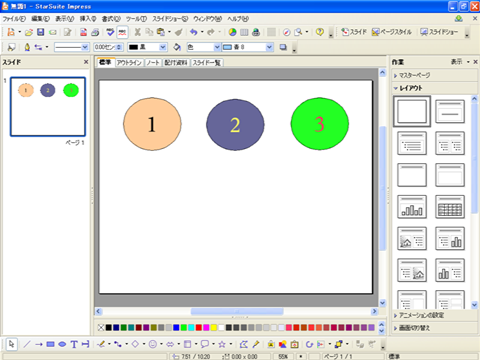
By the way, rather than image files, we can use images (draw object) created by StarSuite Impress (presentation)/Draw. Let us use draw objects for this practice, because we can create a GIF animation without worrying about starting up another application or saving a number of image files.
First of all, start up StarSuite Impress (presentation) and create three (or more, if you like) draw objects as preparation for creating a GIF animation.
The below image shows the situation where you have just created three draw objects.
2. Preparation for the animation window
This is the start of the second step (changing the images into animation) of the two-step process to create a GIF animation.
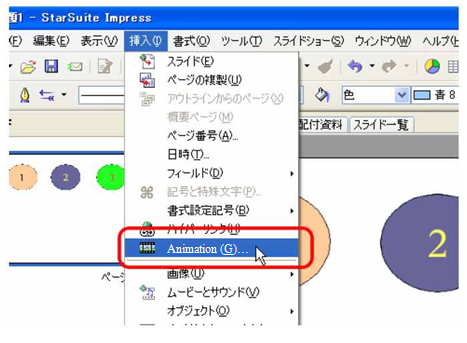
Select “Animation” from the “Slide show” menu of StarSuite Impress (presentation) to open the animation window, which is used to organize the animation frames.
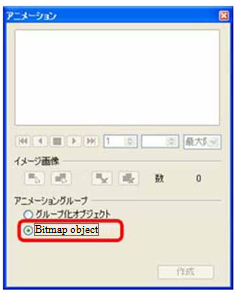
When you open up the animation window, first of all, select “Bitmap object”.
3. Organizing the frames (images)
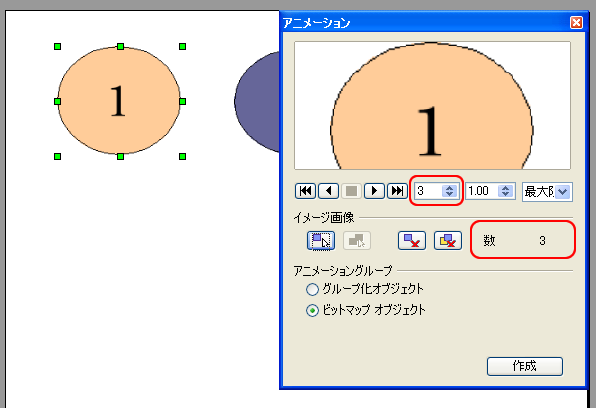
Follow the steps below to register the images. Repeat this process until you register the last frame (the last image of the animation).
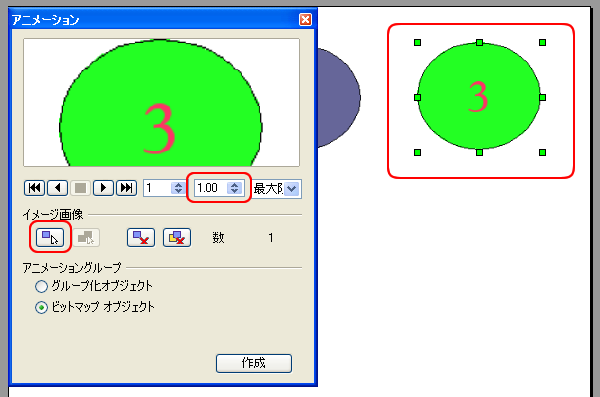
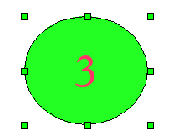
- Select the image that you want to display next (drawn object) by dragging the mouse to encircle it or by clicking on it. When the image is selected, the image (or object) is surrounded by green anchors (In the case of the image below, the figure “3” is selected).
- Click on
 the “Apply object” button on the animation window.
- Set the display time for this frame (image). (The time is set to 1.00 second in the image below.)
To register the first frame
To register the last frame
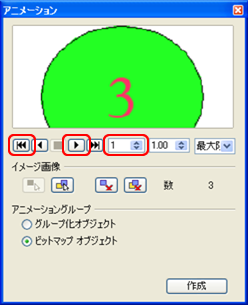
4. Playing/Checking and making adjustment
To check the display, click on  the “First image” button to rewind and click on
  the “Play” button to play the animation.
At this stage, you adjust the display time or reorganize the order of the display of the frame.
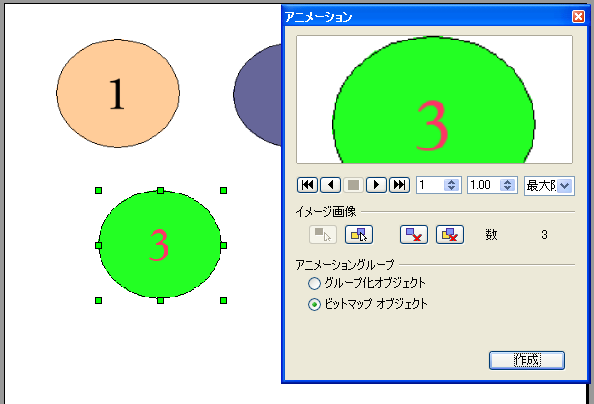
5. Creating an animation object (image)
When you have finished with frame organization, click the “Create” button to create an animation object (animation image).
6. Saving as a GIF file (GIF animation file)
Follow the steps below to save the animation object you created as a gif file.
Once you have checked the animation to see if it plays all right, click this object to select it.
Next, select “Export” from the “File” menu to save this animation object as a GIF animation file, then go through the following steps:
- For “File type”, select “GIF - Graphics Interchange Format (.gif)”.
- Check “Selected area”.
- Move to the “week09” folder and save the file with the name “animation.gif” or any other file name you would like. However, please make sure that the extension is “.gif”.
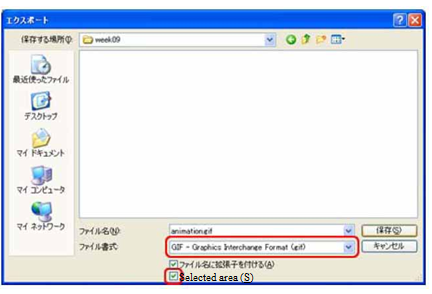
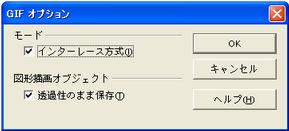
- When a dialogue box to set up “GIF option” pops up, click “OK”. (If you want to change the setting, please make required changes before you click “OK”.)
Displaying the GIF Animation File on a Web Page
Please refer to the example below to enter an additional statement to “week09\ex1.html”, the file used for today’s practice, so that the GIF animation file you created can be displayed.
When you have added the statement, save the file and check the display on the Web Browser to see if the GIF animation works all right.
The Web page which contains a GIF animation
- Sample HTML
-
<p> This is a sample of GIF animation <br>
  <img src="./animation.gif" alt=“animation GIF file”>
</p>
- The results displayed on the Web Browser
-
This is a sample of GIF animation.