
| Practice to Make Sure of a Few Points |
Learn, by going through some practices, the points to be noted when you make a reference using a relative URI on the WWW Server, in addition, how to publish/update a Web page whose styles have been specified by a CSS file.
Publishing a Web Page Whose Styles Have Been Specified
? Specifying a CSS File Using a Relative URI ?
Please follow the steps detailed below to learn how to upload (publish) a Web page whose styles have been specified by a CSS file.
Although the purpose of this practice is “how to publish a Web page whose styles have been specified”, please pay particular attention to, among other things, which file should be uploaded and to where. The key point here is the position of the HTML file relative to the CSS file or vice versa. Please, while recalling the notion of the relative URI, try to gain a full understanding of what you do through this practice.
- Connect to the WWW Server via WinSCP and create “wk09” folder under /public_html folder.
-
Upload “\week09\ex2.html” which you are currently working on to “/public_html/wk09”, the folder you have just created, on the WWW Server.

-
Next, please check the HTML file you have just uploaded on the Web Browser. You know how to enter the (absolute) URI, don’t you? Yes, it is http://st.gsis.kumamoto-u.ac.jp/user-ID/w09/ex2.html.
-
Was the display all right? Or not??
Although the content of the HTML file was displayed all right, the style you set today has not been applied. Why is this? Let us think about this in detail.(Note) Some students might have received a “Not Found” message on the screen; in that case, either the URI you entered to the Web Browser is wrong or the folder to which you uploaded your file is wrong. Please check. -
You could have uploaded a wrong file. Please double click on the icon of the file “week09\ex2.html”, the file you uploaded, on your PC to check the display on the Web Browser.
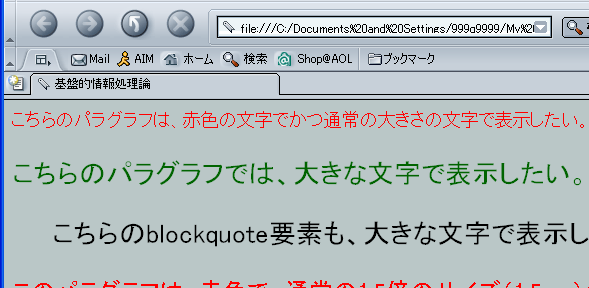 (Note) At this time, please check the display of the address bar on the Web Browser to see if the local address is displayed there.
 -
The style is applied to the file on your PC perfectly, isn’t it?
(Note) If the style was not applied, the file you double clicked (and probably the file you uploaded as well) was wrong. Please check.So it is all right when the file is on your PC. Why then wasn’t the style applied when you uploaded it to the WWW Server?
-
Please recall what you have done at the very beginning of the CSS exercise.
You added the following description to the head element of the “week09\ex2.html”, didn’t you?<link rel="stylesheet" type="text/css" href="../css/mystyle.css">(Note) Actually you added one more line. Do you remember? You can check that here.It is the relative URI “../css/mystyle.css” in the description above that refers to the CSS file which defines the styles. It is in this CSS file that you have been defining styles. Thanks to that, when the file “week09\ex2.html” was displayed on the Web Browser, surely all the styles you defined were there without any problem.
Then, where is “../css/mystyle.css” from the position of ex2.html (strictly speaking, the file ex2.html located at /public_html/w09, which is located under your home directory on the server st.gsis.kumamoto-u.ac.jp) after the file was uploaded to the WWW Server?
As the ex2.html is located at “/public_html/wk09” on the WWW Server, “../css” viewed from there is “/public_html/css”, isn’t it? This means that the ex2.html which has been uploaded to the WWW Server is trying to apply the styles of “/public_html/css/mystyle.css” on the server.By the way, is there “/public_html/css/mystyle.css” on the WWW server? It is not there, is it? You have not created such a folder, and you have not uploaded the CSS file either. This is why the styles you defined were not applied when you displayed ex2.html you uploaded to the Web Browser.
-
Then, let us upload the CSS file as well so that the styles can be applied to the HTML file you uploaded without a problem.
Before you do that, you have to create “../css” folder seen from “/public_html/wk09/ex2.html” on the server. This is the “/public_html/css” folder in absolute reference notation, right?
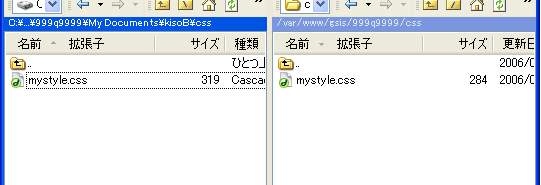
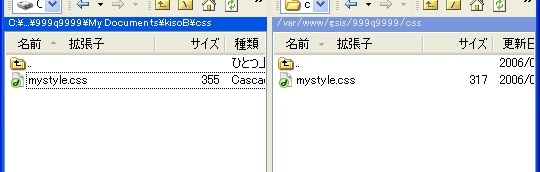
When you have created “/public_html/css” on the server, please upload “css\mystyle.css” there. The image below shows how the WinSCP screen looks like after you uploaded it. Please check the display carefully to see that the folder on the PC side (on the left) and the folder on the WWW Server side (on the right) are as shown in the image below.

-
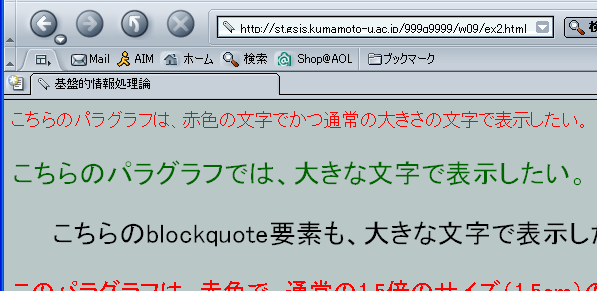
When you have uploaded mystyle.css to the required place, please visit http://st.gsis.kumamoto-u.ac.jp/user-ID/w09/ex2.html once again on the Web Browser. This time the styles were applied successfully, weren’t they?
Updating a Web Page Whose Styles Have Been Specified by a CSS File
Please follow the steps detailed below to learn points to be noted at the time you update a Web page whose styles have been specified by this practice.
-
First of all, let us define a new selector. Please add a class selector called “p.mikan” to “css\mystyle.css” as shown in the image below, then save the file.
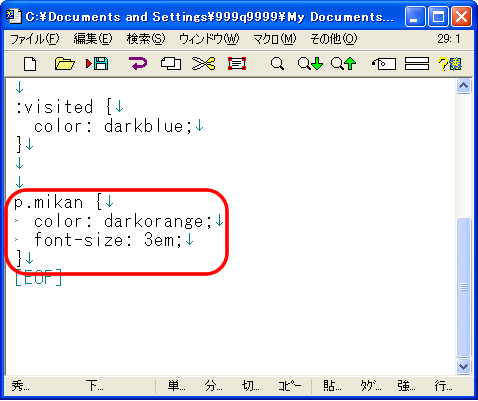 (Note) The function of p.mikan selector is to change the color of the characters to “darkorange” and make the characters three times as large as the normal characters (3em) for the p element whose value of class attribute is “mikan.”
 -
After that, let us change the style of the p element using the class selector p.mikan defined above. Please use the class selector p.mikan in the body element of “week09\ex2.html”.
To use it, please set the value of the class attribute of the p element to “mikan” as shown in the image below.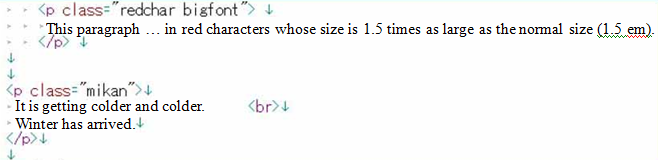
-
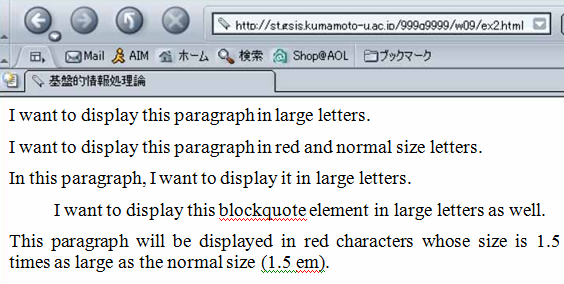
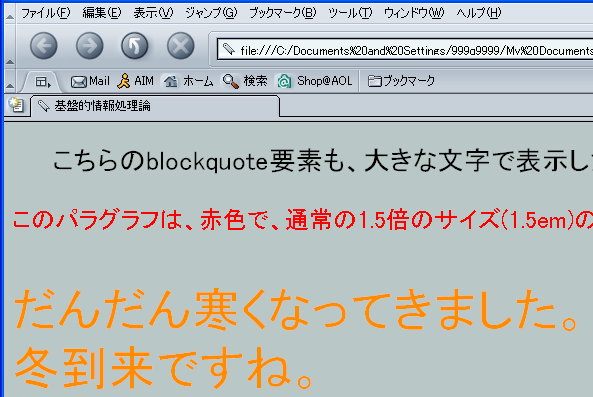
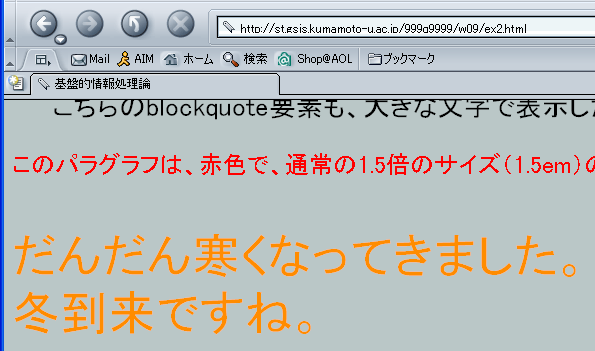
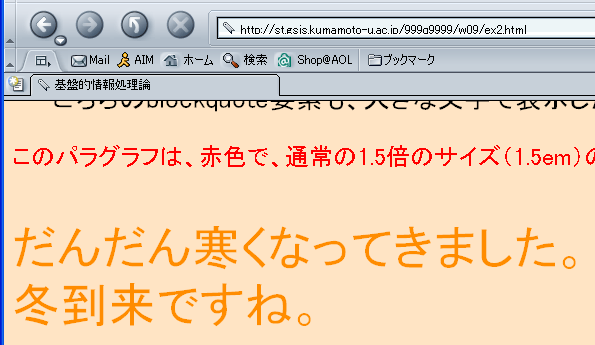
When you display “week09\ex2.html” on the Web Browser (i.e., double click on the icon of the file), the content of the p element whose value of the class attribute is “mikan” will be shown as below where the color of the characters is “darkorange” and the characters are three times as large as the normal ones. Right?
-
Then, let us upload the file to the WWW Server to publish the Web page whose styles have been changed.
Please upload the file to the same place as before so that you update the Web page you have published previously.
You use WinSCP to upload it as you have done a moment ago, don’t you? Please check the PC side folder and the server side folder to make sure that they are all right before you upload the file.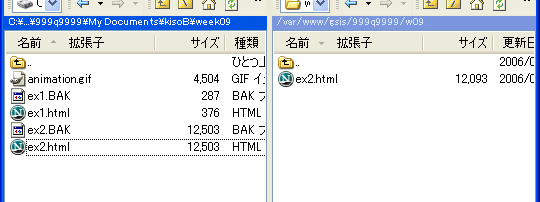
-
When you display the updated Web page on the browser, “Oh, la la!”
Although the text has been added, the style is wrong. Do you know why?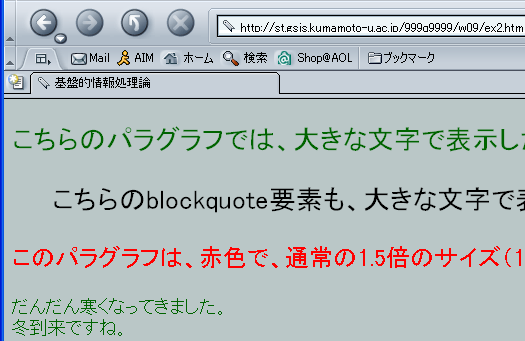
-
You know it, don’t you? That’s right. You not only updated the HTML file, but CSS file as well, didn’t you? As you have not uploaded the modified CSS file, the styles of the CSS file you uploaded last time were applied to the Web page you published. For this reason, the p.mikan you have defined just a moment ago has not been defined for the Web page.
All right then, let us upload the CSS file “css\mystyle.css” once again. Please be careful not to upload it to the wrong place.
-
Please visit http://st.gsis.kumamoto-u.ac.jp/user-ID/w09/ex2.html once again on the Web Browser. This time the styles were applied perfectly. Right?
As you realized through the practice above, to update a Web page whose style (presentation) is controlled by a CSS, you generally update not just the HTML file, but the CSS file as well. To do that, the HTML file as well as the CSS file should be uploaded to the server.
However, in case of the example shown below, it is slightly different. Please follow the steps detailed below to actually try it yourself to see what is the difference between this case and the case above.
-
Please try to change the background color (background-color property) of the body selector (style of the body element) which you set at the beginning of mystyle.css to a different color. As a matter of course, once you have changed it, please save the file.
In the example below, first of all, the previous color setting was copied and then commented out so that you can go back to the original background color later. To comment out, you encircle the range you want to comment out with “/*” and “*/”. Right? In addition, the color is changed from “#bac7c7” to “#ffe4c4”.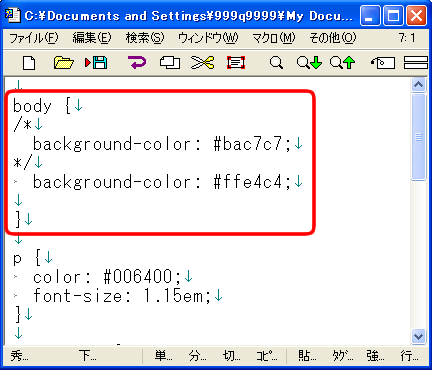
-
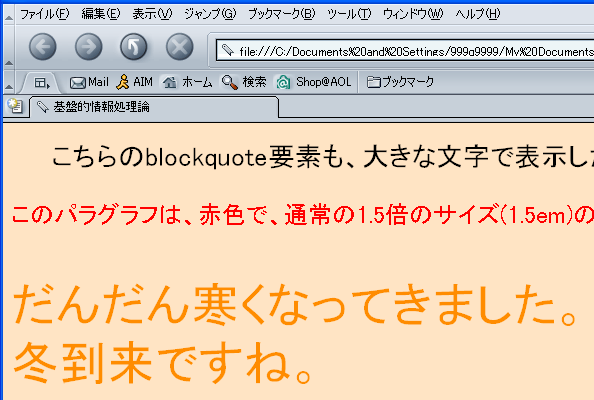
At this stage, if you double click “week09\ex2.html” to display it on the Web Browser, you can see that the background color has been changed as shown below.
-
Let us upload the modified CSS file to the WWW Server. You have done this a number of times. But still, please be careful not to upload it to the wrong destination.
-
When you have uploaded it successfully, the newly set style is applied and background color is changed on the display as shown in the image below.
As shown in the example above, if you want to change just the property of the selector on the CSS file, as you don’t change anything but the CSS file, you don’t have to upload anything to the WWW Server but the CSS file.