
| Copying and Creating Shortcuts for Files and Folders, Renaming Files/Folders |
Learn how to copy files and how to rename files in the OS (Windows XP).
Copying Files and Folders
Create copies and make shortcuts in the folder above by following the instructions below.
We have created files using various application programs. In order to reuse these files efficiently, we need to copy or move these files or folders.
This is a fundamental function of the OS. Most students may have already used this function, however, it should be practiced again here in order to fully utilize the function.
You can copy or move files and folders in the same way we did in the application programs.
Thus, the procedure is:
- Select the file or folder that is the subject of the operation
- “Copy” or “Cut” it
- Move the cursor to the destination folder where you want to copy or move the file to, then “Paste” it
(Note) Previously, when we copied a file, at first we opened a file that was subject to being copied by using the application program, then saved it as another file. This method is too complicated when you just need two of the same items.
Let’s start to make a copy. First, double click on “My Document” to view the list of files.
By the way, we have been using this list of files without any explanation, however, this function is provided by a program called “Explorer,” which is one of the standard functions in Windows XP.
“Explorer” can be executed from the “Start” menu in the same way as for other applications as shown below.
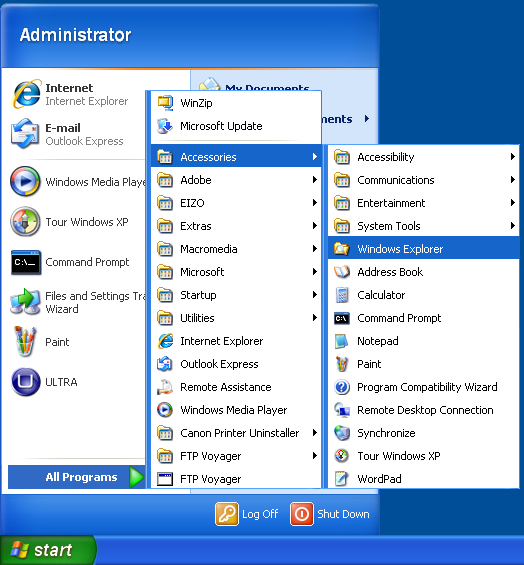
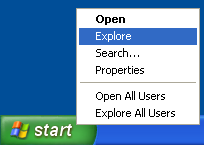
It can be also executed by making a right-click on the “Start” menu. Execute “Explorer” using either of these methods.
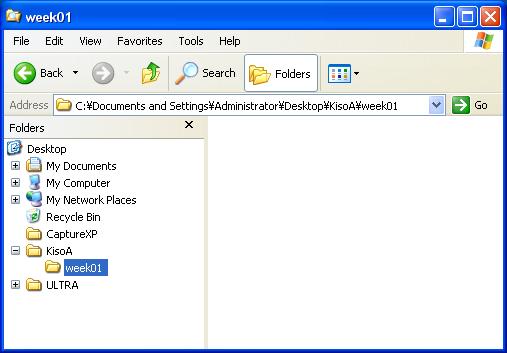
Different from the window that is displayed when you double click “My Documents,” the window displayed using these methods has a sub-window (pane) displaying a list of the drives and folders on the left. This helps you to move over to other drives or folders.
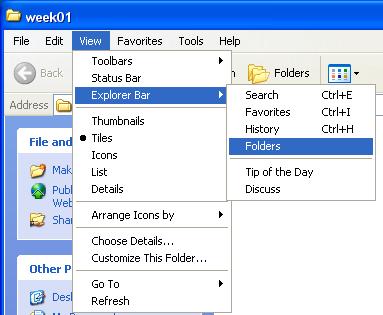
In fact, it is also “Explorer” that provides the window that is displayed when you double click “My Documents,” therefore, it can be displayed in the same style. Select the “Explorer bar” from the “Display” menu then select “Folder” to display it in the same style.

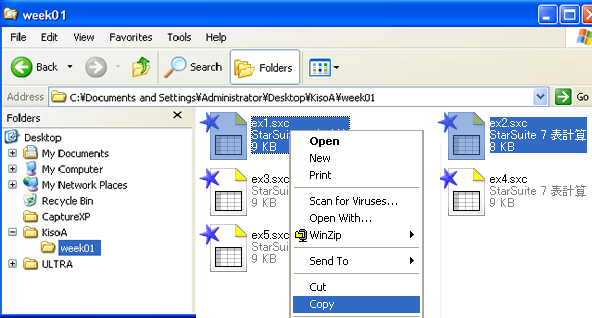
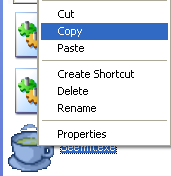
To copy or move a file or folder, first click (for multiple files or folders, drag a box to enclose the desired files or folders) to select the desired file or folder (in the example below, a file in week 01 is to be copied to week 02).
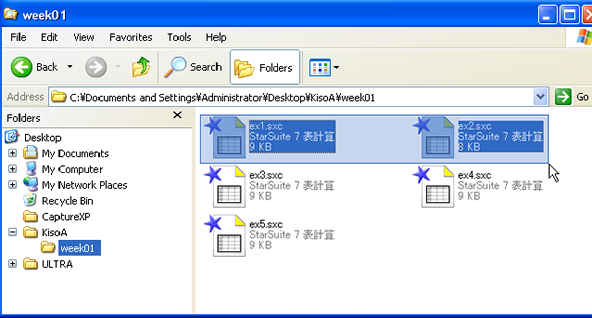
Next, make a right-click to select “Copy” or “Cut.”
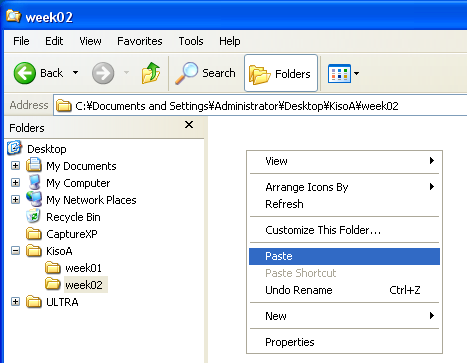
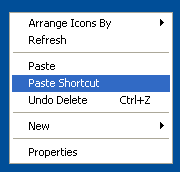
Lastly, move to the destination folder and make a right-click to select “Paste”.
If you “Copy” a file or a folder then paste it within the same folder, it is copied with the string “copy-” added to its name.
On the other hand, if you drag a file or folder to other folders, it functions as “Move.”
However, if you drag a file icon to other media (drive), it functions as “Copy,” not “Move.”
Imagine that when you drag an important file from drive C: to a USB flash memory to create a backup, if the original file was removed, it would not work as a backup. There is no need to worry about this happening.
Creating a Shortcut and Renaming Files/Folders
Sometimes it is handy to place application programs that you use frequently or a file that you are working on onto the desktop or the folder you frequently access. However, it is a waste of disk space to copy the application program itself. In addition to this, if you create a copy of a file other than for backup purposes, it could be difficult to identify which is the genuine file.
For these reasons, we can use “a file that has the same appearance as the genuine file but just indicates like an arrow where the genuine file is.” This file that functions like an arrow pointer is called a “Shortcut”in Windows.
(Note) In other OSs, this is sometimes called an “Alias (or other name)” or a “Link.”As a matter fact, icons on your desktop are also really “Shortcuts” that indicate the actual files.
An icon for a “Shortcut” always has an arrow in the bottom left corner.
In the figure below, the icon on the left is the “Shortcut” that indicates the actual file on the right.


Not only by distinguishing between the icons, the difference between “Shortcut” and the “actual file” can also be shown by checking the property of each. For example, if you make a right-click on the icons above and select “Properties,” then you can see the difference as shown below.
(Note) Substitute drive, folder or shortcut for your actual environment.
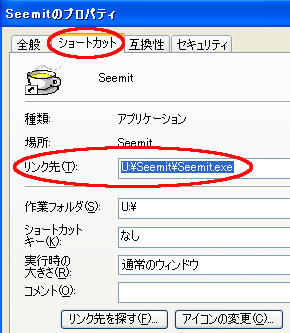
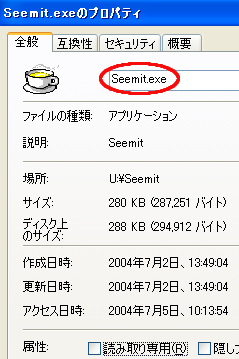
For “actual file,” you can see where it is saved, and for “Shortcut” you can see “the location where the actual file is saved.”
Now, let’s create a “Shortcut.”
There are two methods of creating a “shortcut” as shown below.
- (Method 1) Creating a shortcut in the same location
Select a file that you want to create a “Shortcut” for, and make a right-click to select “Create shortcut.”
Then, generally, it is moved to another folder. - (Method 2) Creating a shortcut in another folder
Select the file that you want to create a “Shortcut” for, and copy it (press the C key with the Ctrl key held down, or make a right-click to select Copy), then move to the destination folder and make a right-click to select “Paste shortcut”


If you have lost an icon (which is in fact a shortcut) on the desktop, you can create it again in the same way as in the example above.
To rename files or folders, first make a right-click on the icon of the file to select “Rename.”
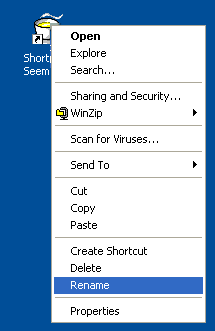
Now you can modify its name field, so enter the desired name.

(Note) No file extension is added since it is a shortcut in the example above, however, for a normal file, be sure not to remove or modify its file extension.