
| Preparation for Uploading to the WWW Server |
Do some preparation, including the initial setup of the SSH/SCP software, for sending (uploading) such required files for the Web page as the HTML files that you have created.
SSH/SCP Setting
Read through the instruction below and install the SSH/SCP software which is required to upload HTML files and other tasks.
(Note) In this course, explanation is given assuming that you use the WinSCP as SCP software. However, you can use any SCP software as you like.
The SSH and SCP are required to upload the Web page you created and access the workspace server provided for individual students. (Although telnet or FTP is used in many cases, at Kumamoto University, we use the SSH or SCP to ensure security.) The password and the user name used for the SSH and SCP are the same as for your email address.
Please note also, as the source information is the same as the email address, when you change the password for the email address,you are changing the password for SSH and SCP as well.To use SCP, you must install SCP client software on your PC and register your user name and password. Please refer to the information below.
1) Downloading the SSH/SCP software (Please access via the [URL reference].)
2) Setting up your user name and password for each piece of software [For those people who use Putty, UTF-8 (CJK) should be selected as a character code.]
[Setting information]
URL of the Web site: st.gsis.kumamoto-u.ac.jp/***/ (Please replace *** with the same user name as for your email. Please insert “/” after the username.)
Name of the server to store the files: st.gsis.kumamoto-u.ac.jp
Location to store the HP data: public_html
Access name and the password: The same as for your email.
[URL reference]
In relation to the SCP: http://centossrv.com/winscp.shtml
In relation to the SSH: http://www.net-newbie.com/putty.html
http://hp.vector.co.jp/authors/VA024651/
http://www.sodan.ecc.u-tokyo.ac.jp/2002/article/tips/ssh/putty.shtml
Connecting to the WWW Server
Please follow the steps below to make a connection to the WWW Server.
Once you are connected, you can create, copy, delete, etc. the files and folders on the WWW Server via network as if they were located on the same PC as you are operating.
A password input window will be displayed when you either double click the server name (www.server) which you specified previously or click the “log in” button after selecting the server name in the WinSCP Host List dialogue box.
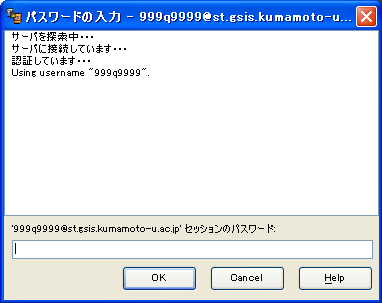
When you enter the password there, the connection to the server will be established and you will have a display as shown below. On this WinSCP window, the files and folders that are being stored on the local PC are displayed in the left window (called a “pane”) and those being stored at the server side are displayed in the right pane.
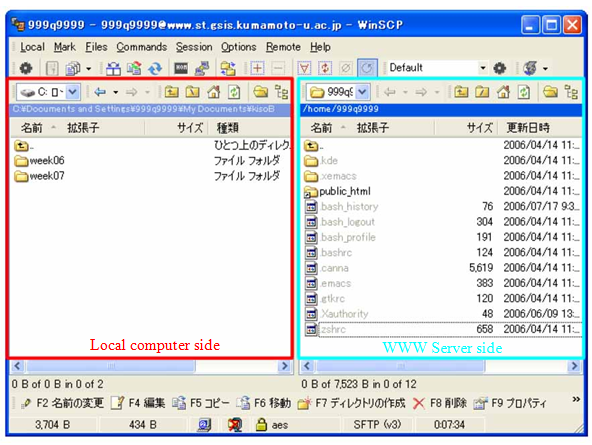
At this stage, if you right click a file or a folder in either pane, you can do all the file operations you have been doing on your PC, including copying, pasting, deleting, changing the name, and creating a new folder.
A Folder Dedicated to Web Page Storage on the WWW Server - public_html -
Web page related files cannot be seen on the Web Browser unless you upload (store) them in a specific folder. In other words, unless you do that, your Web page is not published.
The server side folder (= directory) immediately after you have established a connection to the WWW Server is called the
home directory. However, the place you see when accessed by the Web Browser is usually specified to be a different place. For the WWW Server you use, it is the folder one level immediately below the home directory called
public_html.
(Note) In this course, public_html has been already created for you; however, if there is no public_html, you have to create it by yourself.
Since the name of the folder dedicated for Web pages is defined by the Web Server, your Web page will not be published if you input a wrong file name. The following examples show some common mistakes:
- public html (A white space is inserted between public and html.)
- public-html (A hyphen is inserted between public and html.)
- public.html (Period is inserted between public and html.)
- pubric_html (Wrong spelling: pubric should be public)