| Global Format Setting |
[The purpose of this section]
Overview how to set the global format settings.
Overview how to set the global format settings.
How to Set the Global Format Settings
The global format settings that are used throughout the entire material will be configured in the [Master Mode]. The settings include the page number display and background, and the title text format and bullet style. In this section, we will practice using the [Master Mode].
[Practice 2]
Using the file “week04\ex1.sxi” that you created in Practice 1, set the global settings (Page number display, title text color and size, inserted images and name) to be used for the entire material and then save it as “week04\ex2.sxi”.
Using the file “week04\ex1.sxi” that you created in Practice 1, set the global settings (Page number display, title text color and size, inserted images and name) to be used for the entire material and then save it as “week04\ex2.sxi”.
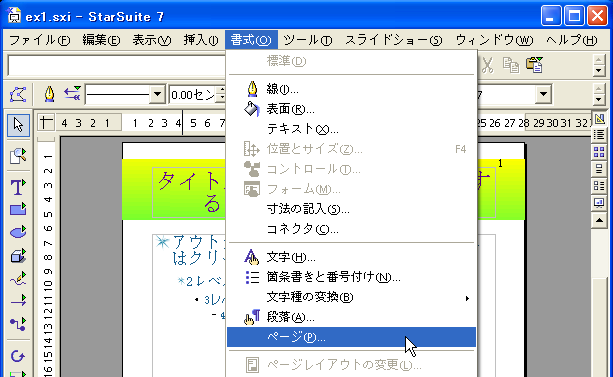
To switch to the Master mode, choose the [View] menu → [Master] → [Draw] or [Title]. Alternatively, click on the [Master Mode] icon shown in the lower left corner as shown below.
In StarSuite 8, this function is called [Slide Master Mode]. To switch to the [Slide Master Mode], select [Master] → [Slide Master] from the menu [View].
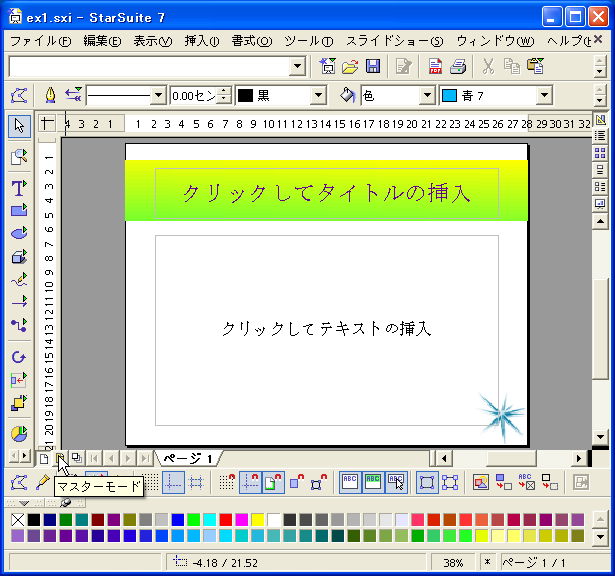
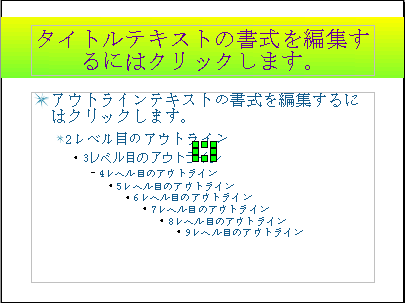
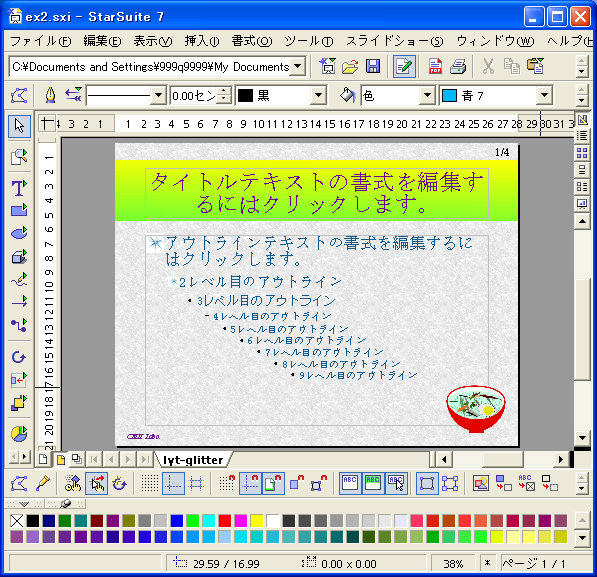
The display will change to a window as shown below.
In the above [Master Mode], you can determine the global format for the entire material (all the pages).
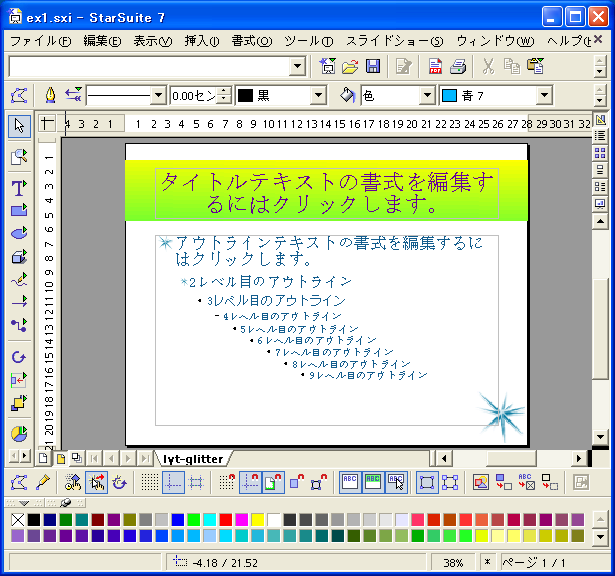
- Format of the title texts
To configure the style, click on the [Click to edit the title text format]. Select the text type, color, size, etc. - Bullet style format
You can configure the text type, color, size, etc. by clicking on the texts such as [Click to edit the outline text format] or [Outline Level x] (x represents number between 2 and 9). You can set the format for each level of the bullet list. In addition, you can set the number and symbol style for the bullet line heads from the [Bullet style and paragraph number] setting under the [Format] menu. You can set only one bullet style for any outline level. - Inserting page numbers
To insert and display page numbers automatically, select [Field] → [Page number] from the [Insert] menu. - Background setting
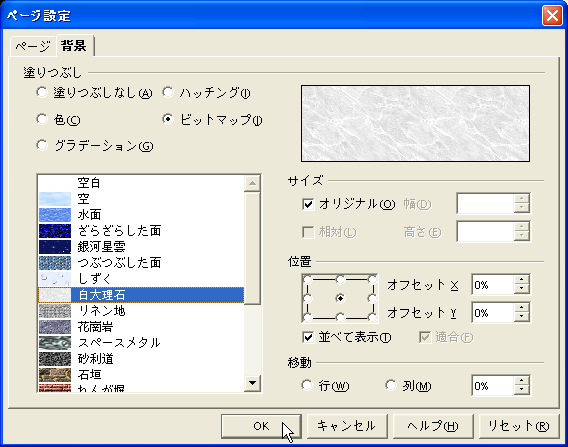
To change the background, select [Page] from the [Format] menu. Select the [Background] tab in the window displayed.
(Note) In Impress, you can also set all the backgrounds for each page in the Draw mode without setting the global background in the Master mode. - Inserting texts and images
To insert a name and a title, or appropriate images for the background, use the [Text] tool or select [Figure](*In StarSuite 8, [Image] is used instead) from the [Insert] menu item. If you do not need any of the texts and images anymore, you can select (click on) it and select [Cut] to delete them.
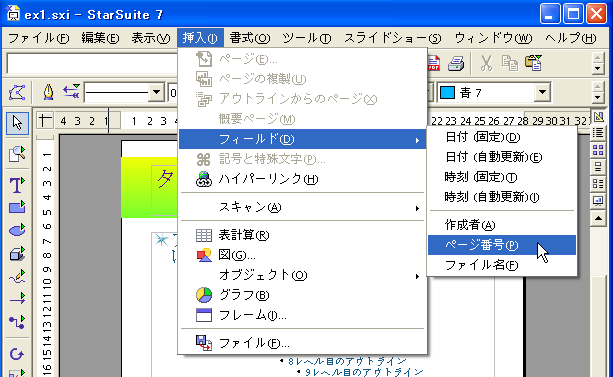
A box that represents the page number location will be displayed around the middle of the page. Move this box to where you want to show the page number. In addition, you can change the font, font size, or font color of the page number in the same way as in regular text.
Then select the necessary settings including [Color] and [Bitmap] and select the respective color you want to use, as well as the bitmaps, and then click on the [OK] button.
In StarSuite 8, you can choose [Color] and [Bitmap] using the pull down menu instead of the radio buttons in the screenshot shown below.
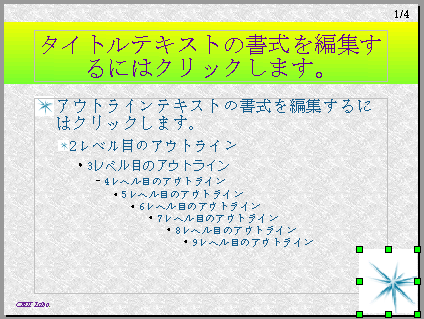
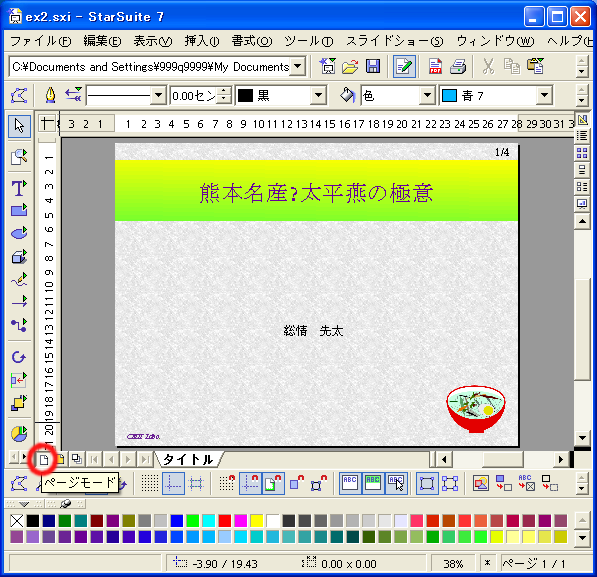
(Note) You can add the total number of pages by adding [/number] in the page number to be displayed (In the image below, “/4” is added since the total number of pages is 4 pages). This tells the audience where the displayed page is located in the entire material.
Now, the global format settings have been completed.
Next, let’s switch back to the [Page Mode] and create the actual material.
To go to the [Page Mode], select [Page Mode] from [View] menu or click on the [Page Mode] icon on the lower left of the window.
In StarSuite 8, select [View] menu → [Normal].