
| Slide Show and Animations |
[The purpose of this section]
Practice using a slide show of the presentation and practice using animation functions that you can use when you want to highlight specific points in your document.
Practice using a slide show of the presentation and practice using animation functions that you can use when you want to highlight specific points in your document.
Slide Show
This is a function to display materials in full screen mode on the PC. It may be no exaggeration to say that presentation software is called "Software for presentation" because it has this very function.
To switch to the Slide show mode, select [Run slide show] from the [Slide show] menu or click on the [Run slide show] icons on the left and right side of the window.
* In StarSuite 8, you can perform the same operation using the [Slide show] icon in the upper right corner of the window.
In the Slide show mode, you can advance to the next page by clicking on the mouse button. To go back to the previous slide, right click on the mouse. If you want to quit the presentation, press the [ESC] key.
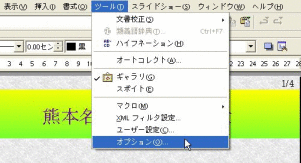
(Note) If you want to run a slide show from the currently displayed page from another mode such as the Draw mode, follow the following instructions.
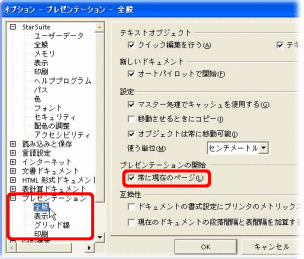
Select [Option] from the [Tool] menu and double click on the [Presentation] (*In StarSuite 8, [StarSuite Impress]). When the submenu is displayed, click on [General] and turn on the [Always start with current page] checkbox under the [Start of the presentation]. If you remove the checkmark, the slide show will always start from the first page.
Select [Option] from the [Tool] menu and double click on the [Presentation] (*In StarSuite 8, [StarSuite Impress]). When the submenu is displayed, click on [General] and turn on the [Always start with current page] checkbox under the [Start of the presentation]. If you remove the checkmark, the slide show will always start from the first page.

Animation
This function is used to add an accent to the visual effects of the slide show. You can create page transition or page switching effects, as well as choose different display methods for texts and images, and create animated images.
(Caution)
If you use too much animation in a presentation, your audience cannot concentrate on the important points of your presentation; their attention is focused on the movement of the animation only. It is better to use animated effects only for the most effective points.
If you use too much animation in a presentation, your audience cannot concentrate on the important points of your presentation; their attention is focused on the movement of the animation only. It is better to use animated effects only for the most effective points.
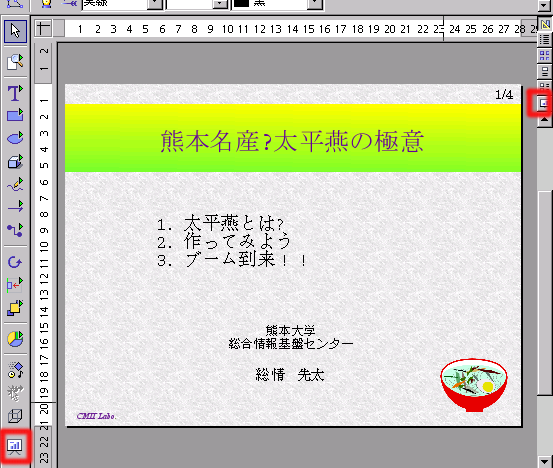
[Practice 4]
Add some animation functions in the file "week04\ex3.sxi" that you have created in Practice 3 to complete your material. Save the completed material as "week04\ex4.sxi".
Add some animation functions in the file "week04\ex3.sxi" that you have created in Practice 3 to complete your material. Save the completed material as "week04\ex4.sxi".
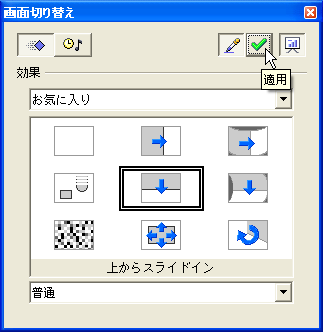
- Animation during a page transition or page switching
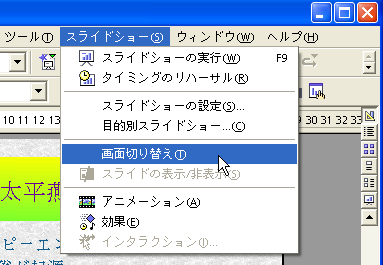
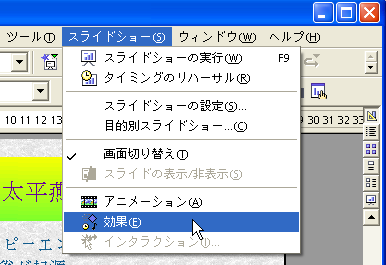
- In the Draw mode, select [Screen switching] from the [Slide show] menu.
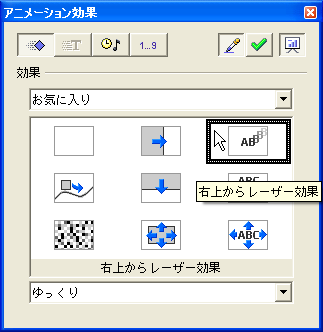
* In StarSuite 8, you can do the same operation by selecting [Screen switching] in the bottom of the [Work] panel on the right. - In the dialog box displayed, select the animation effect that you want to use. There are many animation option groups other than the [Favorites] group. Please explore and try them.
- In the pull down menu in the bottom of the dialog box, select the animation speed.
- If you activate the
 button, the [Preview window] where you can preview the animated movement in the slide show will be displayed.
 - When you finish editing the settings, click on the
 (Apply) to apply the effect.
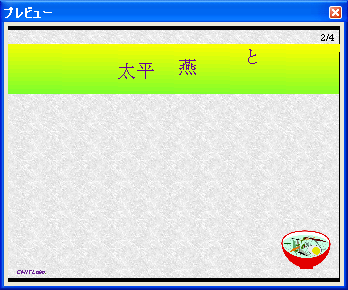
The actual animated movement will be displayed in the preview window. - Animation of texts and images
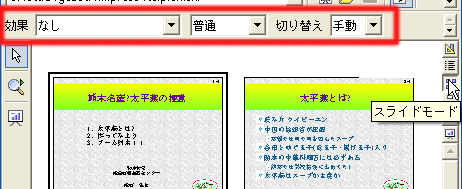
- In the Draw mode, select [Effect] from the [Slide show] menu (* For StarSuite 8, select [Animation setting] instead).
* In StarSuite 8, you can perform the same operation from the [Animation setting] in the [Work] panel in the right side of the window. - In the Draw mode, select the group of texts, image or objects that you want to make animated.
- In the dialog box displayed, select the animation effect that you want to use.
- Click on the (Apply) button
to apply the effect and review the actual animated movement in the preview window.
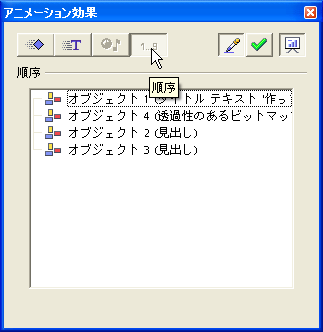
- In addition, by clicking on the
 (Order) button after selecting the group to be animated in the Draw mode, you can specify the order of when each group will start animating.
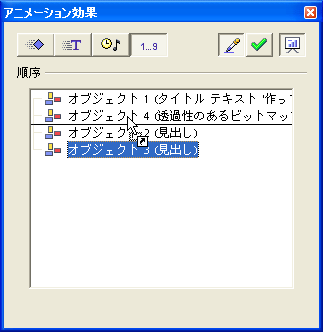
- In the [Order] field, drag each object name to achieve the desired order. The animation runs in the order from top to bottom.
When you are finished defining the order, click on the button to apply and review the animated movement in the preview window.
(Note) If you click on
 ,
you can see the type of effect that is currently set.
,
you can see the type of effect that is currently set. 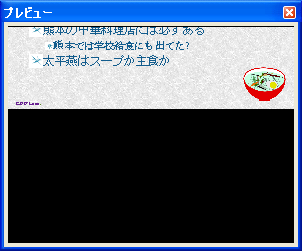
(Note) In the preview window, you can see the actual animated movement just by clicking the window.
(Note) You can also configure the animation for screen transition in the options bar in the Slide mode.
(Caution) Animation can only be applied to a group (objects).
For example, if you want to animate only one line in a bullet listing, you have to separate the line as a new group (one line only text) and then apply the animation effect to that group.
(Note) The screenshot shown above is edited so that you can see the animation effect more easily and is somewhat different from the actual animation that you will see in the file.
(Note) You can download the sample files used in this lesson and they can be downloaded from HERE