
| Creating and Editing Pages |
[The purpose of this section]
Overview how to create and edit each page.
Overview how to create and edit each page.
(Please check) Did you return to the [Page Mode] already?
[Master Mode] is the mode used for global settings for the entire document. If you are not sure how to switch to [Page Mode], please refer to the former section and switch to [Page Mode].
[Practice 3]
Add 2 or more pages that contain the main text pages for the file "week04\ex2.sxi" that you created in Practice 2 and save it as "week04\ex3.sxi".
The text can be really simple. (It also could be meaningless text.)
Add 2 or more pages that contain the main text pages for the file "week04\ex2.sxi" that you created in Practice 2 and save it as "week04\ex3.sxi".
The text can be really simple. (It also could be meaningless text.)
Creating and Adding Pages
In the former section, we created a top title page. This time, select [Page] from the [Insert] menu item to create a new page.
* In StarSuite 8, select [Slide] instead of [Page].
(Note) If you select [Duplicate page] from the [Insert] menu, a copy of the page that is currently displayed will be created. This function comes in handy when you want to make a page with a similar format.

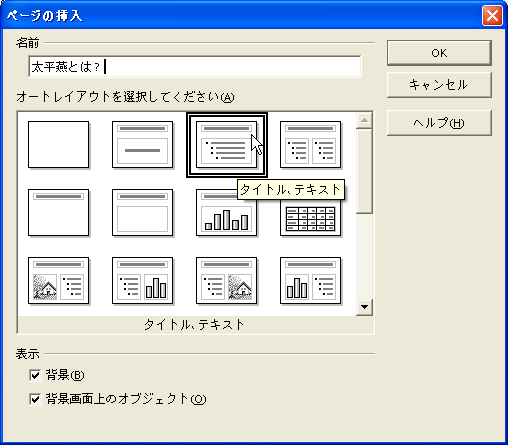
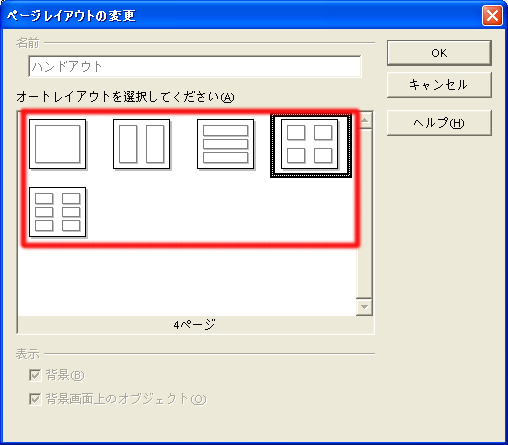
The auto layout selection window like the one shown below will be displayed. Enter the title of the page in the [Name] field and then select the desired layout for the page and click on the [OK] button. (Generally, you may want to select the layout [Title, Text].)
* If you are using StarSuite 8, right click on the appropriate slide on the left [slide] panel and select [Change slide name] to change the name. In addition, you can change the layout using the [Work] panel in the right panel.
Then a window like that below will be displayed.
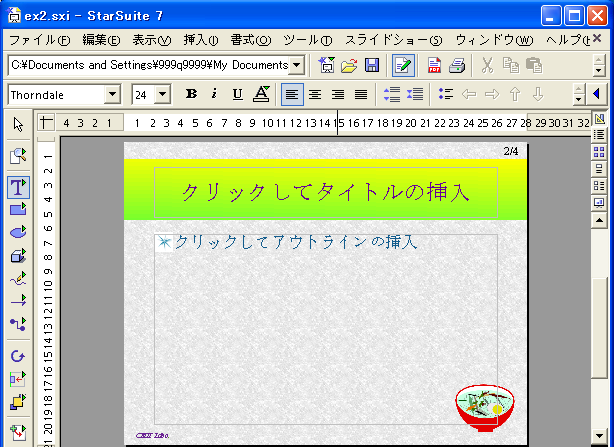
Click on the [Click here to enter title] field and type in the title.

Click on the [Click here to enter outline] field and type in the contents that you want to include in the page (items for bullet listing). After you have finished entering one item, press the [Enter] key. Then, the cursor will move to the top of the next item in the bullet listing automatically.
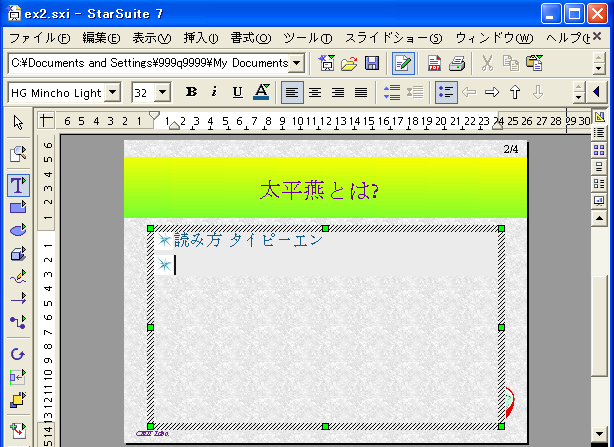
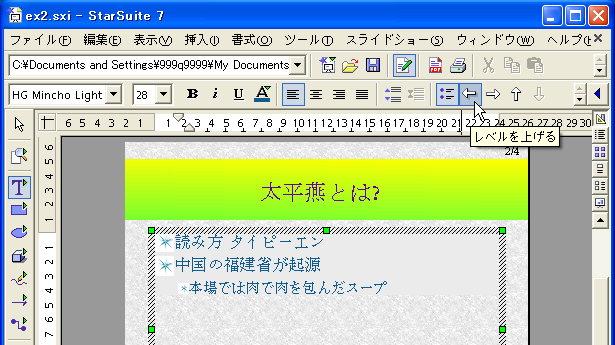
To indent a line in the bullet list, press the [TAB] key or click on the (Decrease the indent level) in the Object bar. To move it back to the upper level, press the [TAB] key while pressing [Shift] or click on the
  (Increase indent level) in the Object bar.
Create a page using the methods shown above. When you finish a page, create the rest of the pages using the same methods.
You can change the current active page by clicking its tab located in the bottom of the window. You can use this tab to choose a page to review/modify/edit any of the pages you have created.
* In StarSuite 8, you can carry out the same operation from the [Slide] panel.

Moreover, you can drag the tab to the right or left to change the order of the page.

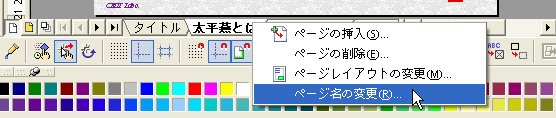
In addition, you can right click on the tab to change the page title.
* In StarSuite 8, select [Slide] instead of [Page].
(Note) If you select [Duplicate page] from the [Insert] menu, a copy of the page that is currently displayed will be created. This function comes in handy when you want to make a page with a similar format.
The auto layout selection window like the one shown below will be displayed. Enter the title of the page in the [Name] field and then select the desired layout for the page and click on the [OK] button. (Generally, you may want to select the layout [Title, Text].)
* If you are using StarSuite 8, right click on the appropriate slide on the left [slide] panel and select [Change slide name] to change the name. In addition, you can change the layout using the [Work] panel in the right panel.
Then a window like that below will be displayed.
Click on the [Click here to enter title] field and type in the title.
Click on the [Click here to enter outline] field and type in the contents that you want to include in the page (items for bullet listing). After you have finished entering one item, press the [Enter] key. Then, the cursor will move to the top of the next item in the bullet listing automatically.
To indent a line in the bullet list, press the [TAB] key or click on the
(Decrease the indent level) in the Object bar. To move it back to the upper level, press the [TAB] key while pressing [Shift] or click on the (Increase indent level) in the Object bar.
(Note) The method of inserting or drawing an image, and inserting or editing text is the same as for Draw function that you are going to learn in Chapter 3 in this Session 4.
How to use Draw function will be explained in Chapter 3 and later.
Create a page using the methods shown above. When you finish a page, create the rest of the pages using the same methods.
You can change the current active page by clicking its tab located in the bottom of the window. You can use this tab to choose a page to review/modify/edit any of the pages you have created.
* In StarSuite 8, you can carry out the same operation from the [Slide] panel.
Moreover, you can drag the tab to the right or left to change the order of the page.
In addition, you can right click on the tab to change the page title.
Various Material Creation Modes
There are modes for creating materials other than the mode that we have been using in the above sections (Draw Mode). To change the mode, select [Work Mode] from the [View] menu or click on the icon displayed in the upper right part of the window.
In this section, we will show the features of each mode.
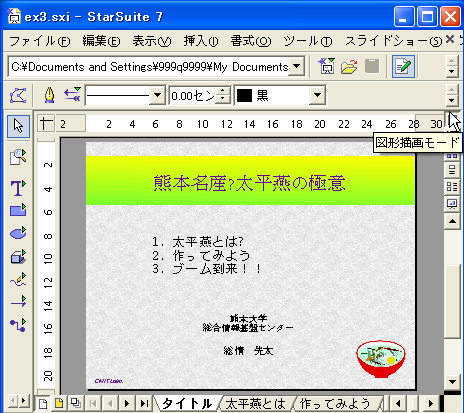
- Draw Mode
This is the normal mode you would use most often as you have been using it in this course. Most of the work will be done in this mode including drawing figures.
* This is equivalent to the [Normal] tab in StarSuite 8. - Outline Mode
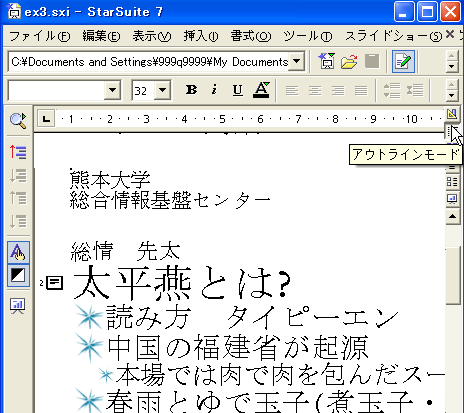
In this mode, you can create an outline of the structure of your material. You can easily type the titles and item descriptions for each page without switching pages as if you are using a word processor software application.
* This is equivalent to the [Outline] tab in StarSuite 8. - Slide Mode
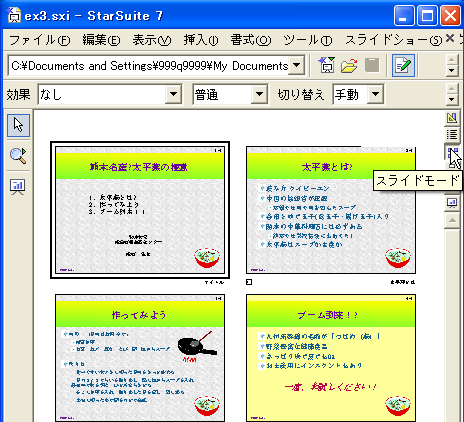
In this mode, you can view all the pages at once in small thumbnail images. This mode is very helpful when you change the order of the pages or want to delete unnecessary pages, since it provides a better view of the structure of the entire material.
In addition, in the actual presentation setting, when the audience is asking questions, you may use this mode to find and display the relevant page.
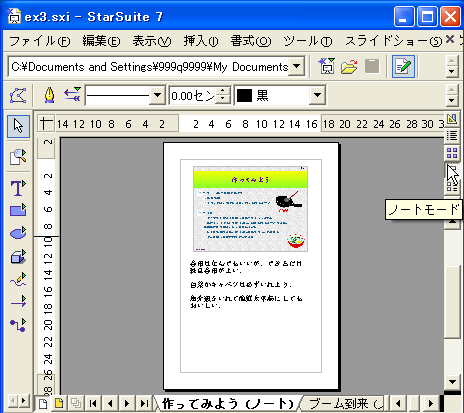
* This is equivalent to the [Slide List] tab in StarSuite 8. - Note Mode
In this mode, you can write notes on each page. When you are in this mode, the page that was created in the Draw mode is displayed in a smaller scale; below this image there is an area for you to enter a description or notes. For example, if you prepare a presentation script before the actual meeting, it would be very helpful to practice the presentation. If you write information that cannot fit in the page in the Draw mode, you may be able to include it in a more detailed handout for the audience.
* This is equivalent to the [Note] tab in StarSuite 8. - Handout Mode
In this mode, you can create handout materials for your audience. You can add the comments printed only in the handout on the appropriate page or decide the page layout for printing multiple slides on one page.
* This is equivalent to the [Handout] tab in StarSuite 8.
(Note) The descriptions and notes written in the Note mode will not be displayed in the slide show (we will cover this later). You may consider this mode as a mode for "writing secret memos".
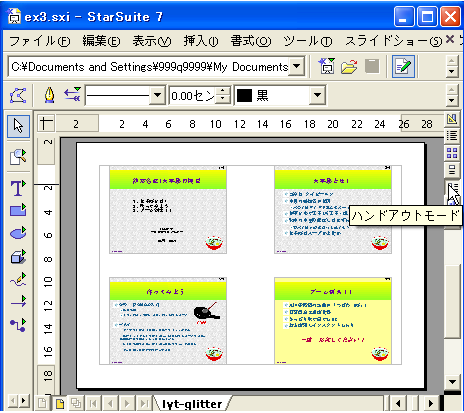
(Note) How many slides that can be printed on one sheet of paper will be defined under the [Changing Layout] from the [Format] menu.
* In StarSuite 8, you can perform the same operation from the [Work] panel in the right side of the window.
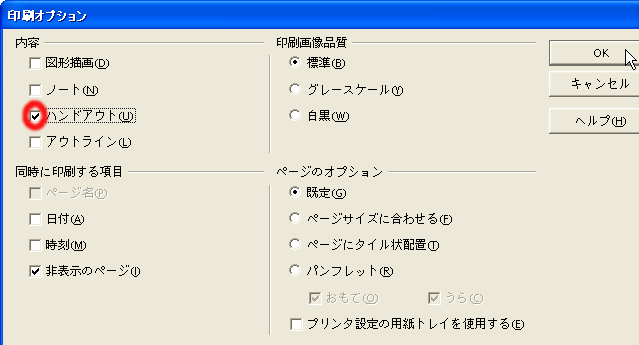
(Note) To print handouts, follow the instructions:
Select [Print] form the [File] menu. In the Print dialog box which will be displayed, click on [Option]. In the next dialog displayed, find the [Contents] group and activate only the [Handout] option and then click on [OK].
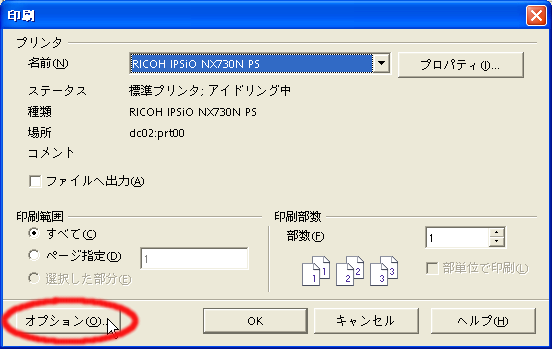

Select [Print] form the [File] menu. In the Print dialog box which will be displayed, click on [Option]. In the next dialog displayed, find the [Contents] group and activate only the [Handout] option and then click on [OK].