
| Basic Shape Drawing with Draw |
[The purpose of this section]
Learn the drawing tools for basic shapes in StarSuite Draw.
Learn the drawing tools for basic shapes in StarSuite Draw.
Using Standard Toolbar
In the standard toolbar, there are a set of icons for drawing text, rectangles, circles, linear lines, and curved lines. You will draw illustrations by combining these basic shapes.
[Practice 7]
Draw various shapes by selecting the [Rectangle], [Eclipse], [Curve], and [Line and arrow] tools from the standard toolbar one after another. After the drawing is finished, change the border width, color, and fill pattern and color of each shape. When finished, save the file as "ex1.sxd" in the [week04] folder.
Draw various shapes by selecting the [Rectangle], [Eclipse], [Curve], and [Line and arrow] tools from the standard toolbar one after another. After the drawing is finished, change the border width, color, and fill pattern and color of each shape. When finished, save the file as "ex1.sxd" in the [week04] folder.
To draw a rectangle, follow these instructions: Try the same procedure with other shapes.
- Click on the [Rectangle] icon in the standard toolbar.
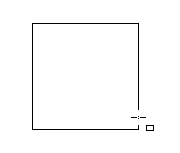
- Then the pointer will change to what is shown below so that you can draw rectangles by dragging the mouse to create the shape.
- Left click and drag the mouse and release it at an appropriate position, so that a rectangle is created.
Click somewhere outside the shape that you have just drawn (rectangle) to release the tool.
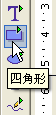


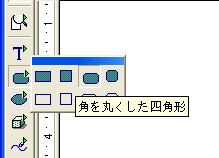
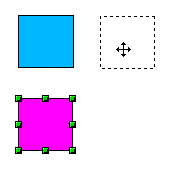
(Note 1) To specify the detailed settings of the basic shapes, move the mouse cursor over one of the standard toolbar icons and keep pressing the left button of the mouse for about 1 second. The options shown below will be displayed.
(Note 2) To enter text, select the [Text] tool (the icon with "T" shape) from the standard toolbar. When it is selected, the object bar will change to the same toolbar as you are using Writer software.

Selecting Shapes
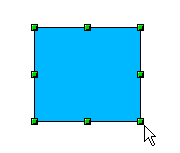
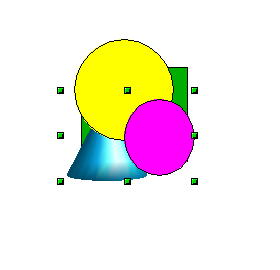
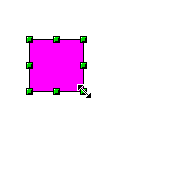
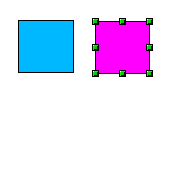
When a green handle is displayed as shown below, it means that the shape is active (Selected).
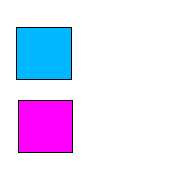
Under this "Selected" status, you can change various attributes such as the location, size, and colors of this shape. You can also copy the shape (Select [Copy] from the [Edit] menu) and paste it as many time as you want (Select [Paste] from [Edit] menu).
(Caution)
You cannot see the pasted shape since it will be pasted on top of the currently selected one. Try to move the shape now.
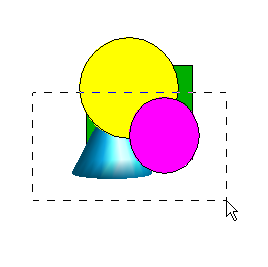
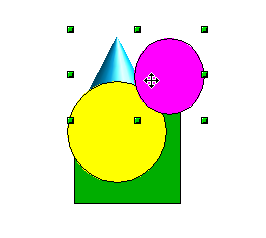
If you draw a box around multiple shapes while pressing the left mouse button, the shapes inside the box will all be selected at the same time.
In addition, if you click on the items while pressing the Shift key, all the shapes that are clicked while the Shift key is pressed will be selected.
While they are selected, you can change the shape of all the selected drawings or move them at the same time.
(Caution)Under this "Selected" status, you can change various attributes such as the location, size, and colors of this shape. You can also copy the shape (Select [Copy] from the [Edit] menu) and paste it as many time as you want (Select [Paste] from [Edit] menu).
(Caution)
You cannot see the pasted shape since it will be pasted on top of the currently selected one. Try to move the shape now.
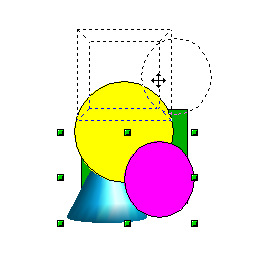
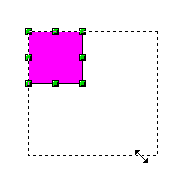
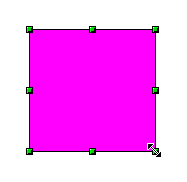
- Grab the handle (by clicking the left button of the mouse) and drag it to change the size of the shape. To change the size of the shape without changing the aspect ratio, drag the handle while pressing the [Shift] key.
- To move the shape, click anywhere in the shape except the handles (by clicking the left button of the mouse) and dragging it.
If you draw a box around multiple shapes while pressing the left mouse button, the shapes inside the box will all be selected at the same time.
In addition, if you click on the items while pressing the Shift key, all the shapes that are clicked while the Shift key is pressed will be selected.
While they are selected, you can change the shape of all the selected drawings or move them at the same time.
The items that you want to select need to be entirely in the box. For example, in the above image, the yellow circle and green rectangle are not selected because they are not completely enclosed in the box.
[Practice 8]
Select some of the objects that you have drawn in Practice 7 and then move them or change the shape of them. When you have finished, save them as "ex2.sxd" in the [week04] folder.
Select some of the objects that you have drawn in Practice 7 and then move them or change the shape of them. When you have finished, save them as "ex2.sxd" in the [week04] folder.