
| How to Create Documents with Word Processors |
[The purpose of this section]
Acquire how to create a document using a word processor.
Acquire how to create a document using a word processor.
Creating Documents
Generally, there are three ways (steps) to create a document as follows.
- Create a document from scratch.
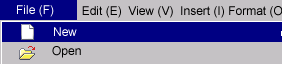
- Start an application (word processor) and select something like “New” from the “File” menu.
- Set the format for the whole document such as the letter size and line length, if they are already decided at this stage.
- Decide on the file name and save the document in a designated folder.

In order to avoid problems due to system trouble, save the document frequently while you are working on it. - Organize the format while inputting text.
- Refine the format by importing external data (figures, tables, etc.) and adding text.
- When you finish, save the file and close the application.
- Modify and expand the material you have created.
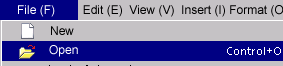
- Start an application (word processor) and select something like “Open” from the “File” menu.
- Specify and load the material you have created.
- Modify and expand the document following the above instruction A3-A6.
- Create a new document based on the material that you or another relevant person has created.
- Start an application (word processor) and select something like “Open” from the “File” menu.
- Specify and load the material already created.
- Delete unnecessary parts leaving the necessary text (materials) and format.
- Decide on another file name and save the document in a designated folder.

- Create a new document following the above instructions A4-A6.
(*) Materials created with other applications may be utilized with the Copy and Paste function.
Since the functions above are essential not only in creating a document, but also in using a PC, practice them well to master them.
Keep in mind that it is especially important to save (overwrite) the file frequently while you are working with the document in order to avoid problems due to system trouble and in order not to waste your efforts.
Starting StarSuite-Writer- and Saving Files
This time, we will use Writer, the word processing software included in StarSuite.
(Note) If you have different word processor software installed in your PC, you may use it.
(Note) If you have different word processor software installed in your PC, you may use it.
[Practice 1]
Start StarSuite-Writer- and input your full name.
Start StarSuite-Writer- and input your full name.
[Practice 2]
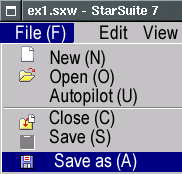
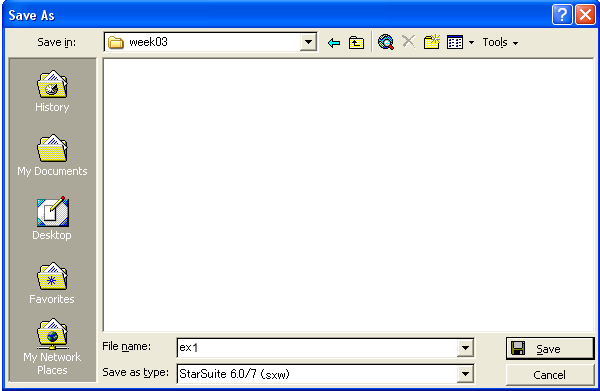
Save the file created in Practice 1 as “ex1.sxw” in the “kisoA\week03” folder.
Note that all of the characters of “ex1.sxw” should be single-byte characters.
Save the file created in Practice 1 as “ex1.sxw” in the “kisoA\week03” folder.
Note that all of the characters of “ex1.sxw” should be single-byte characters.
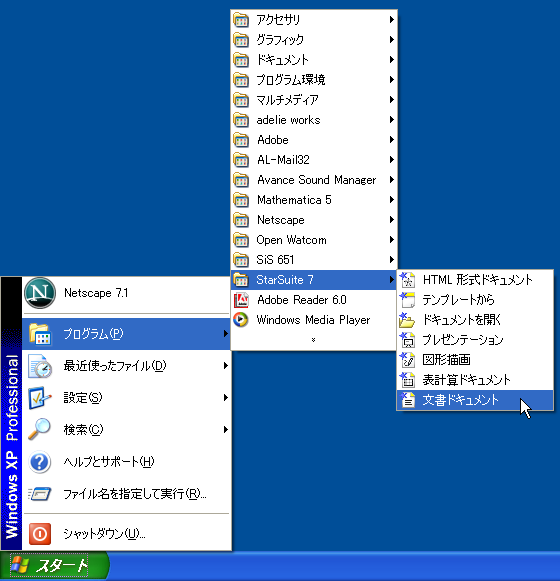
- Start Writer by selecting from the “Start” menu ? “StarSuite 7” ? “Document”.
? If you use StarSuite 8, select “Start” menu ? “StarSuite 8” ? “StarSuite Writer”. - Input your full name in the window that appears, and select “Save” from “File” menu.
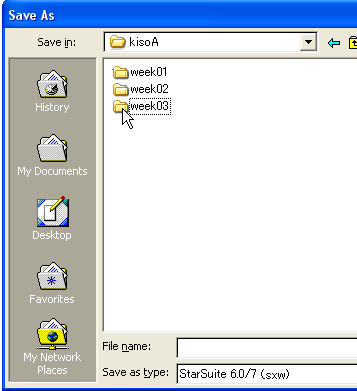
- Click on “My Document” in the left portion of the window that will appear, and double click on “kisoA”, which will appear next in the right window in order to move to the kisoA folder.
- Then, double click on “week03” which will appear in the right window in order to move to the week03 folder.
- Input the file name as “ex1” (the extension “.sxw” can be omitted), and click on the “Save” button to save the file.


When you save files, make it a rule to move the file to the “ place (folder) where the file is to be saved” (create a folder if necessary) before naming and saving the file.
Otherwise, the file you have created may be lost and you have to make the file again.